I remember my grandmother's kitchen, a magical place filled with the scent of cinnamon and vanilla, a culinary haven where every dish was made with love and a pinch of secret family magic. Every Sunday, after a big family meal, she'd pull out her old stand mixer, a beast of a machine that had seen decades of baking. We kids would gather around, eyes wide with anticipation, mesmerized by the whirring blades. Her famous strawberry shortcake was always the star, but it wasn't just the shortcake we craved; it was the cloud-like topping she crowned it with. That, my friends, was my first introduction to a truly spectacular homemade whipped cream recipe. It wasn't the stuff from a can; it was real, rich, and utterly divine, a delicate counterpoint to the sweet berries and tender shortcake. For years, I thought it was some kind of arcane culinary secret, guarded by generations of bakers, until she finally shared her simple trick. And today, I’m going to share that very same, incredibly easy whipped cream recipe with you. It’s a game-changer for any dessert, instantly elevating it from good to absolutely unforgettable. Trust me, once you master this simple technique, you'll find yourself reaching for this whipped cream recipe again and again. You’ll never go back to store-bought, I promise.
Why This Whipped Cream Recipe is a Must-Try
- Unbeatable Fresh Flavor: Store-bought versions simply can't compare to the rich, creamy, and pure vanilla notes of homemade whipped cream. This whipped cream recipe highlights fresh, simple ingredients, delivering a taste experience that is unparalleled.
- Customizable Sweetness: You have complete control over how sweet your whipped cream is, allowing you to tailor it perfectly to your dessert or personal preference. No more overly sweet or bland toppings – just perfection with this **whipped cream recipe**.
- Simple & Quick: With just three core ingredients and a few minutes of effort, you can transform heavy cream into a light, airy, and stable topping. This easy **whipped cream recipe** makes dessert prep a breeze, even on busy weeknights.
- Versatility: This fluffy cloud of deliciousness isn't just for pie! It's perfect for fresh fruit, coffee, hot chocolate, pancakes, waffles, and so much more. This **whipped cream recipe** is a true all-rounder in the kitchen, ready to enhance almost any sweet dish.
Key Ingredient Notes for Your Perfect Whipped Cream Recipe
Creating the ultimate whipped cream recipe hinges on understanding your few but mighty ingredients. Quality and temperature are key for flawless results every time:
Heavy Cream (or Heavy Whipping Cream)
This is undeniably the star of our show. You absolutely need cream with at least 36% milk fat to ensure it whips up properly and holds its structure. Lower fat creams (like "light cream" or "half-and-half") simply don't have enough fat to stabilize the air bubbles needed for that signature fluffy texture of homemade whipped cream. Always make sure your heavy cream is very cold. Cold fat molecules are crucial for proper emulsification and air incorporation. If your cream is warm, it will struggle immensely to whip, take a significantly longer time, and might even curdle or deflate quickly once formed. Think of it like a cold foundation for a strong structure – essential for this **whipped cream recipe**.
Powdered Sugar (Confectioners' Sugar)
While granulated sugar can certainly be used in a pinch, powdered sugar is highly recommended for this whipped cream recipe. Why? Because it contains a small amount of cornstarch, which acts as a fantastic stabilizer. This means your whipped cream will hold its shape longer, be less likely to weep (separate liquid), and maintain its beautiful volume. Additionally, powdered sugar dissolves instantly, giving you a smooth, lump-free texture without any grittiness. If you only have granulated sugar, it will work, but your whipped cream might be slightly less stable and a bit grainy if the crystals aren't fully dissolved during whipping.
Vanilla Extract (or Vanilla Bean Paste)
A good quality pure vanilla extract makes all the difference, adding warmth, depth, and a classic aromatic sweetness to our simple whipped cream recipe. For an extra gourmet touch and a more intense vanilla flavor, consider using vanilla bean paste, which will also add beautiful, tiny flecks of vanilla bean to your cream, indicating its premium quality. Avoid "imitation vanilla" if possible, as it can have an artificial aftertaste that detracts from the delicate, fresh flavor of the cream. The vanilla is the subtle magic that elevates this simple topping.
Step-by-Step Guide with Pro Tips for this Whipped Cream Recipe
Making this whipped cream recipe is incredibly simple, but a few pro tips will ensure perfect results every single time, giving you that light, airy, and stable texture you're dreaming of.
Step 1: Chill your mixing bowl (preferably a metal or glass bowl, which retains cold better than plastic) and whisk attachment (or beater) in the freezer for 10-15 minutes, or in the refrigerator for at least 30 minutes, before you begin. The logic here is simple: cold fat molecules are crucial for proper emulsification and air incorporation, leading to a stable whipped cream. If your cream and equipment are warm, the cream will struggle immensely to whip, take a significantly longer time, and might even curdle or deflate quickly. This is your foundation for a successful **whipped cream recipe**.
Step 2: Pour the very cold heavy cream into your now chilled mixing bowl. Add the precise amount of powdered sugar you desire – I usually start with 2 tablespoons for a subtly sweet cream, but adjust to your preference – and the pure vanilla extract. At this stage, resist the urge to start whipping immediately. A quick, gentle stir with a spoon can help prevent the powdered sugar from puffing up everywhere when you first turn on the mixer, a common minor frustration when embarking on a new **whipped cream recipe**.
Step 3: Using an electric mixer (whether it's a trusty stand mixer with a whisk attachment or a versatile hand mixer), begin whipping on a low speed for about 30 seconds. This allows the ingredients to combine without splashing. Gradually increase the speed to medium-high. As the cream whips, you'll observe distinct stages: it will first become frothy, then thicken to soft peaks (where the cream holds its shape but the tip flops over gently), and finally to medium or stiff peaks (where the cream holds its shape firmly and points upward). This entire process usually takes anywhere from 2 to 5 minutes, depending significantly on your mixer's power and the initial temperature of your cream. The key to a successful **whipped cream recipe** is constant observation and a readiness to stop.
Pro Tip: Don't Overwhip! This is where many home cooks falter. Overwhipped cream will quickly become grainy, then separated, and eventually turn into butter. Keep a close watch as you approach the stiff peaks stage. Stop just when the cream holds its shape firmly. For some desserts, like a delicate mousse or a simple fruit topping, soft peaks are perfectly acceptable and often preferred for their lighter mouthfeel. However, if you plan to pipe your whipped cream or need it to hold a more defined shape, like for a sweet potato pie, aim for medium to stiff peaks for this **whipped cream recipe**.
Step 4: Your freshly made **whipped cream recipe** is undoubtedly best served right away for maximum fluffiness and exquisite texture. If you anticipate having leftovers or need to prepare it a bit in advance, transfer it promptly to an airtight container (I highly recommend using durable Basics Glass Food Storage containers for optimal freshness and visibility) and refrigerate. It will typically hold its shape and freshness for a couple of days, though it may lose a little bit of its initial volume and airiness over time. A quick, gentle whisk by hand for 15-30 seconds just before serving can often bring back much of its original fluffiness and structure. This makes this **whipped cream recipe** an excellent make-ahead component for various dishes, like serving alongside warm Monkey Bread.
Variations & Serving Suggestions for Your Whipped Cream Recipe
This basic whipped cream recipe is more than just a simple topping; it's a versatile canvas, begging for your creative culinary touch. Don't be afraid to experiment and personalize it to match your mood or the dessert it's accompanying. Here are a few inspiring ideas to get you started:
Flavor Variations to Elevate Your Whipped Cream Recipe:
- Chocolate Whipped Cream: For the chocoholics out there! Sift 2 tablespoons of high-quality unsweetened cocoa powder along with the powdered sugar. This creates a rich, decadent chocolate cloud perfect for brownies or a mug of hot cocoa, enhancing this **whipped cream recipe**.
- Coffee/Espresso Whipped Cream: A fantastic pairing for coffee-based desserts or simply a dollop in your morning brew. Add ½ teaspoon of instant espresso powder (first dissolved in 1 teaspoon of hot water and then cooled completely) or a splash of coffee liqueur (like Kahlua) to the cream mixture.
- Citrus Whipped Cream: Brighten up any dessert with a zesty kick! Add 1-2 teaspoons of finely grated fresh lemon, orange, or lime zest. The aromatic oils in the zest will infuse the cream with a wonderful, refreshing flavor, making this **whipped cream recipe** pop.
- Spiced Whipped Cream: Ideal for cozy fall and winter desserts. Incorporate ¼ to ½ teaspoon of ground cinnamon, nutmeg, pumpkin pie spice, or even a pinch of cardamom with the powdered sugar. This is divine on apple pie or gingerbread.
- Almond Whipped Cream: For a distinctly nutty and sophisticated flavor profile, substitute the vanilla extract with ½ teaspoon of pure almond extract. This works beautifully with fruit tarts or cherry desserts, giving a unique twist to your **whipped cream recipe**.
- Liqueur Whipped Cream: For a truly adult dessert experience, fold in 1-2 tablespoons of your favorite liqueur towards the end of whipping. Think Grand Marnier for a citrusy note, Irish cream for coffee pairings, or a dark rum for tropical fruit desserts. Just be mindful that too much liquid can prevent the cream from whipping properly, so add gradually.
Creative Serving Suggestions for this Whipped Cream Recipe:
- Classic Dessert Topping: The most obvious, yet undeniably satisfying, use! Spoon it generously over fruit pies, elegant layer cakes, delicate fruit tarts, rich brownies, and simple cookies. It instantly elevates any sweet treat.
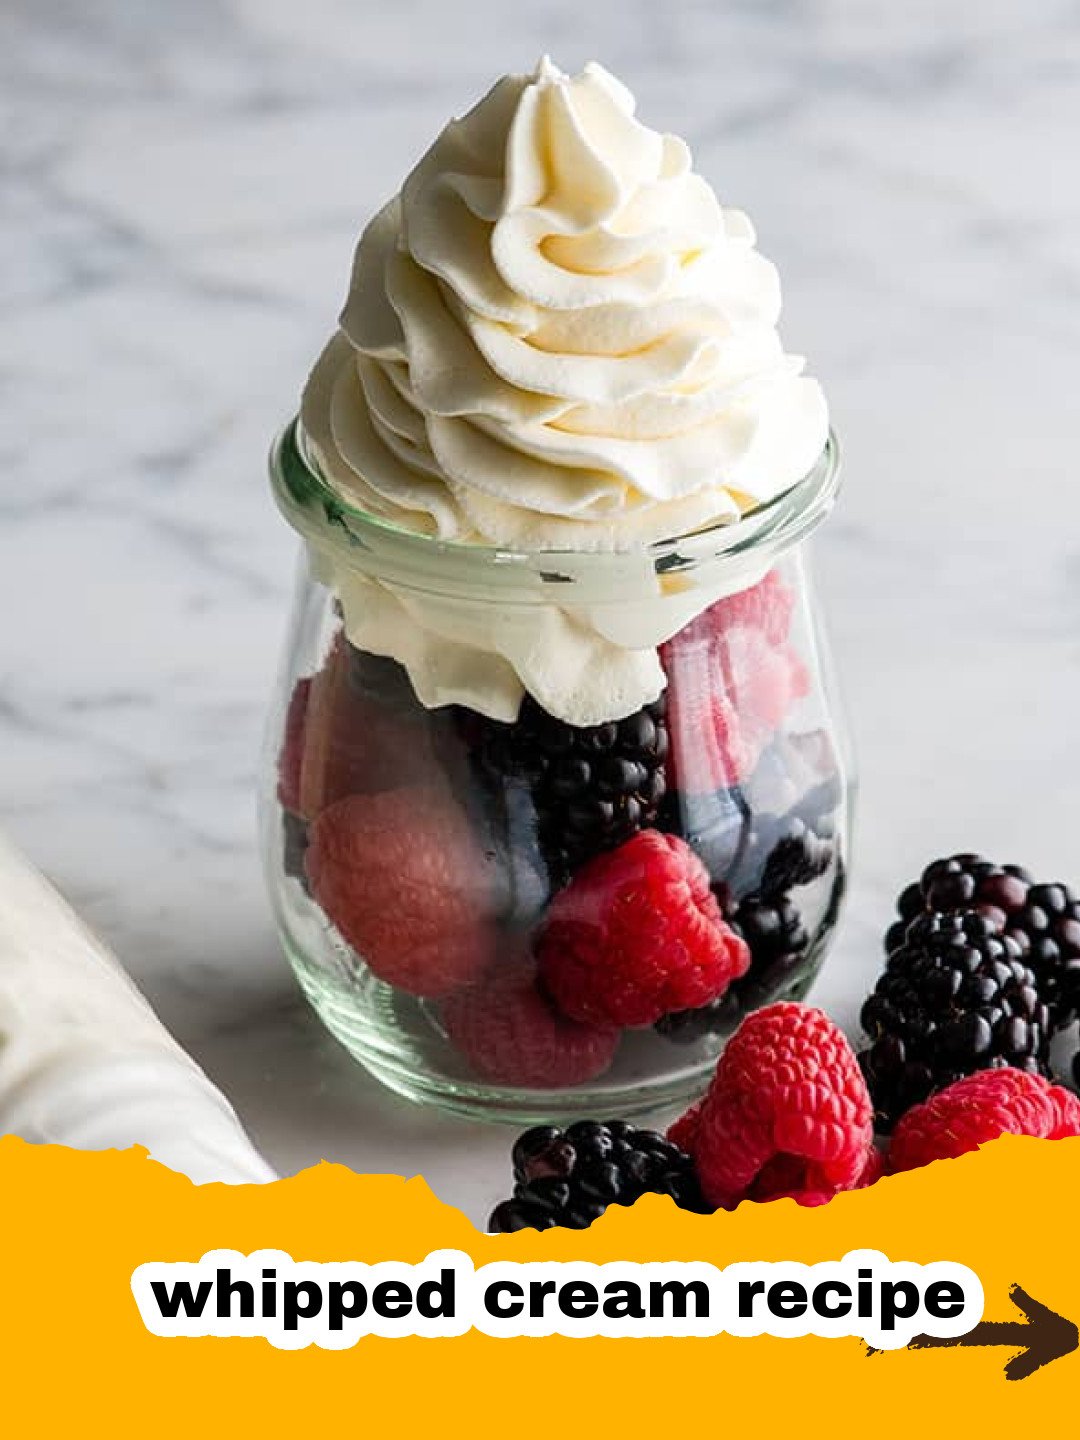
- Fruit Extravaganza: Transform a simple bowl of fresh berries (strawberries, blueberries, raspberries, or a mix) into an elegant and healthy-ish dessert with a generous dollop of this fresh **whipped cream recipe**. It's light, refreshing, and highlights the natural sweetness of the fruit.
- Hot Beverages: Elevate your everyday hot chocolate, morning coffee, or after-dinner espresso with a luxurious swirl of homemade whipped cream. A sprinkle of cocoa powder or cinnamon on top makes it extra special.
- Breakfast & Brunch Delight: Don't reserve it just for dessert! This creamy goodness is a perfect accompaniment for fluffy pancakes, crispy waffles, indulgent French toast, or even a fancy oatmeal bowl. Imagine a stack of pancakes with fresh berries and this divine **whipped cream recipe**!
- Parfaits & Trifles: Layer this creamy goodness with fresh fruit, crumbled cake pieces, granola, or even cookie crumbs for a beautiful and delicious parfait or trifle. It adds a wonderful texture and richness to these layered desserts.
Nutrition Information for this Whipped Cream Recipe
Here's a breakdown of the nutritional content for one serving of this delightful homemade whipped cream. Please note that these are estimates and can vary based on specific ingredients and brands used.
| Nutrient | Amount Per Serving |
|---|---|
| Calories | 100 kcal |
| Carbohydrate Content | 3g |
| Cholesterol Content | 35mg |
| Fat Content | 10g |
| Fiber Content | 0g |
| Protein Content | 1g |
| Saturated Fat Content | 6g |
| Serving Size | 2 tablespoons (28g) |
| Sodium Content | 10mg |
| Sugar Content | 3g |
| Trans Fat Content | 0.3g |
| Unsaturated Fat Content | 3g |
Conclusion
There you have it – the secret to a truly perfect homemade whipped cream recipe. It’s more than just a topping; it’s a simple luxury that elevates any culinary creation, making every bite feel a little more special. Whether you’re dolloping it generously onto a slice of pie, swirling it into your morning coffee, or simply enjoying it with fresh berries, this easy **whipped cream recipe** will undoubtedly become a cherished staple in your kitchen. So grab that cold cream, chill your bowl, and get ready to whip up some magic. Happy whipping!
FAQs
How long does homemade whipped cream last?
Homemade whipped cream, when stored in an airtight container in the refrigerator, typically lasts for 2 to 3 days. It may lose some of its volume and become slightly less stable over time, but it will still be delicious. A quick whisk by hand can often revive its fluffiness before serving.
Why won't my whipped cream get stiff?
The most common reasons for whipped cream not stiffening are: 1) The cream wasn't cold enough, or the mixing bowl/whisk wasn't chilled. Cold fat whips best. 2) Using a cream with insufficient fat content (e.g., light cream instead of heavy whipping cream, which needs at least 36% milk fat). 3) Over-mixing initially, which can sometimes break down the emulsion before it fully forms, or trying to whip low-fat cream too long.
Can I make whipped cream ahead of time?
Yes, you can make whipped cream a few hours to a day in advance. Store it in an airtight container in the refrigerator. Before serving, give it a gentle whisk by hand for about 15-30 seconds to restore some of its lost volume and fluffiness. If you used powdered sugar, it will be more stable due to the cornstarch content, making it a good choice for make-ahead preparations.
What's the best way to store leftover whipped cream?
Store leftover whipped cream in an airtight container in the coldest part of your refrigerator. While it will keep for a few days, it's always best enjoyed as fresh as possible. Avoid freezing whipped cream, as it tends to separate and become watery upon thawing, losing its light and airy texture. For best results, consider storing in a glass food storage container to maintain freshness and prevent odor absorption.

Effortless Homemade Whipped Cream
- Total Time: 5 minutes
- Yield: About 2 cups 1x
Description
Learn how to make the best whipped cream recipe at home with just three simple ingredients! This guide ensures a perfectly fluffy, stable, and deliciously sweet topping for all your favorite desserts. Forget store-bought; homemade is always superior and truly elevates any dish.
Ingredients
1 cup (240ml) very cold heavy whipping cream (at least 36% milk fat)
2-3 tablespoons powdered sugar (confectioners' sugar), or to taste
½ - 1 teaspoon pure vanilla extract (or vanilla bean paste)
Instructions
Step 1: Chill your mixing bowl (preferably metal or glass) and whisk attachment in the freezer for 10-15 minutes, or in the refrigerator for at least 30 minutes. This is crucial for successful whipping, as cold equipment helps the cream stay cold and whip more efficiently.
Step 2: Pour the very cold heavy cream into the chilled mixing bowl. Add the powdered sugar and vanilla extract. A gentle stir before whipping can help prevent the powdered sugar from creating a cloud in your kitchen.
Step 3: Using an electric mixer (stand mixer with whisk attachment or hand mixer), start whipping on low speed for about 30 seconds. Gradually increase to medium-high speed. Continue whipping until the cream reaches your desired consistency, from soft peaks (tips curl over) to stiff peaks (holds its shape firmly). This typically takes 2-5 minutes, depending on your mixer and cream temperature. Be careful not to overbeat, or it will turn grainy and then into butter.
Step 4: Serve your homemade whipped cream immediately for the freshest, fluffiest texture. If not serving right away, transfer it to an airtight container and store in the refrigerator for up to 2-3 days. A quick whisk by hand can refresh it before serving to restore some of its lost volume and airiness.
Notes
For a slightly richer flavor, you can use a combination of heavy cream and crème fraîche. Ensure all your equipment and cream are thoroughly chilled for the best and quickest results; this step truly makes a difference in the stability of your whipped cream.
- Prep Time: 5 minutes
- Cook Time: 0 minutes
- Category: Dessert
- Cuisine: American
Nutrition
- Serving Size: 2 tablespoons (28g)
- Calories: 100 kcal
- Sugar: 3g
- Sodium: 10mg
- Fat: 10g
- Saturated Fat: 6g
- Unsaturated Fat: 3g
- Trans Fat: 0.3g
- Carbohydrates: 3g
- Fiber: 0g
- Protein: 1g
- Cholesterol: 35mg
Leave a Reply