My grandmother, bless her heart, had a way with eggs. Every family gathering, without fail, a platter of her famous deviled eggs would appear. The moment they hit the table, it was a silent race to see who could snag one first. There was something magical about them – perfectly creamy, just the right tang, and that little sprinkle of paprika that made them pop. It wasn't just a dish; it was a memory, a taste of home. Today, I'm thrilled to share my tried-and-true classic deviled eggs recipe, a homage to those cherished family traditions. It’s more than just a snack; it’s an experience, a little bite of happiness that always brings people together. If you're looking to recreate that nostalgic flavor and impress your guests, you've come to the right place. This deviled eggs recipe is simple, yet utterly delightful, and I promise, it'll become a staple in your kitchen too.
Why This Deviled Eggs Recipe is a Must-Try
There are countless reasons why this particular deviled eggs recipe stands out from the rest. It's not just about the eggs; it's about the perfect balance of flavors and textures that make every bite unforgettable. Here are a few compelling reasons why you should make this your go-to:
- Unmatched Creaminess: Our carefully balanced ratio of ingredients ensures a filling that's incredibly smooth and luxurious, melting in your mouth with every bite.
- Perfect Tangy Kick: The combination of Dijon mustard and a touch of vinegar provides just the right amount of tanginess to cut through the richness, elevating the flavor profile beyond the ordinary. This classic deviled eggs recipe truly hits all the right notes.
- Crowd-Pleaser Guaranteed: From backyard BBQs to elegant holiday dinners, deviled eggs are a universally loved appetizer. This deviled eggs recipe is a guaranteed hit, disappearing quickly no matter the occasion.
- Simple Yet Impressive: Despite its sophisticated taste and appearance, this deviled eggs recipe is surprisingly easy to make. With a few simple steps and fresh ingredients, you can create a dish that looks and tastes like it came from a gourmet kitchen.
Key Ingredient Notes for the Best Deviled Eggs Recipe
While the overall process for making a great deviled eggs recipe is straightforward, the quality and preparation of a few key ingredients can make all the difference between good and truly spectacular.
Eggs
Choosing and preparing your eggs correctly is the foundation of any great deviled eggs recipe. While ultra-fresh eggs are wonderful for scrambling or frying, for hard-boiling, eggs that are about a week to ten days old are actually preferred. This is because as eggs age slightly, the membrane beneath the shell loosens, making them significantly easier to peel without tearing the whites. For the best hard-boiled eggs for this deviled eggs recipe, start them in cold water, bring to a rolling boil, then remove from heat, cover, and let them sit for precisely 12-15 minutes before transferring to an ice bath. This method helps prevent the dreaded green ring around the yolk and ensures perfectly set whites.
Mayonnaise
The mayonnaise is the creamy soul of your deviled eggs recipe filling. Do not skimp on quality here! A good, full-fat mayonnaise will provide the rich, smooth texture and robust flavor that makes deviled eggs so irresistible. Avoid low-fat or salad dressing varieties, as they can result in a watery or less flavorful filling. The creaminess of the mayo binds all the flavors together, creating that signature lusciousness we all crave in a classic deviled eggs recipe.
Dijon Mustard & White Vinegar
These two unsung heroes are crucial for balancing the richness of the yolks and mayonnaise, giving your deviled eggs recipe its signature tangy zing. Dijon mustard adds a complex, slightly spicy, and tangy note that is far superior to regular yellow mustard for this application. White vinegar (or a good apple cider vinegar) brightens the entire mixture, cutting through the fat and adding a refreshing acidity. Together, they prevent the filling from being one-note and heavy, ensuring each bite of your deviled eggs recipe is vibrant and exciting. Don't worry about it tasting too vinegary; it's about balance!
Step-by-Step Guide with Pro Tips for Your Deviled Eggs Recipe
Creating the perfect deviled eggs recipe is an art, but with these detailed steps and pro tips, you'll master it in no time. Get ready to impress everyone with your culinary skills!
Step 1: Perfectly Boil Your Eggs. Carefully place one dozen large eggs in a single layer in a large saucepan. Add enough cold water to cover the eggs by at least one inch. Bring the water to a rolling boil over high heat. Once boiling, immediately turn off the heat, cover the pan with a lid, and let the eggs sit in the hot water for exactly 12-15 minutes. This method ensures perfectly cooked yolks without the green ring.
Step 2: Prepare an Ice Bath. While the eggs are sitting, prepare a large bowl with ice water. This ice bath is crucial for stopping the cooking process and making the eggs easier to peel. As soon as the 12-15 minutes are up, use a slotted spoon to transfer the hot eggs directly into the ice bath. Let them cool for at least 5-10 minutes, or until completely cool to the touch. This sudden temperature change helps the egg whites contract, making the shells much easier to remove – a secret for a perfect deviled eggs recipe.
Step 3: Peel the Eggs. Gently tap each cooled egg on a hard surface to crack the shell all over. Roll the egg between your hands to further loosen the shell. Starting from the larger end where the air pocket is, carefully peel the shell under cool running water. The water helps to wash away small shell fragments and makes the peeling smoother. Take your time to ensure the egg whites remain intact and smooth, ready for your amazing deviled eggs recipe.
Step 4: Halve and Scoop. Once peeled, carefully slice each hard-boiled egg in half lengthwise with a sharp knife. Gently scoop out the bright yellow yolks into a medium-sized mixing bowl. Place the egg white halves on a platter or a Basics Glass Food Storage container, ready for filling. These storage containers are great for prep and transport, ensuring your deviled eggs recipe stays fresh.
Step 5: Create the Creamy Filling. Using a fork, thoroughly mash the egg yolks in the mixing bowl until they are completely smooth and free of lumps. Add the mayonnaise, Dijon mustard, white vinegar, salt, and black pepper to the mashed yolks. If you like a little heat, add a pinch of cayenne pepper now. Mix all the ingredients together vigorously until the filling is perfectly smooth, creamy, and well combined. Taste and adjust seasonings if necessary; you might want a little more salt, pepper, or tang. This is the heart of your deviled eggs recipe!
Step 6: Fill the Egg Whites. You have two main options for filling:
- For a rustic look: Simply use a small spoon to mound the filling generously into each egg white cavity.
- For a professional presentation: Transfer the creamy yolk mixture into a piping bag fitted with a star tip (or a Ziploc bag with a corner snipped off). Pipe the filling neatly into each egg white half, creating an attractive swirl or dome. This presentation truly elevates your deviled eggs recipe.
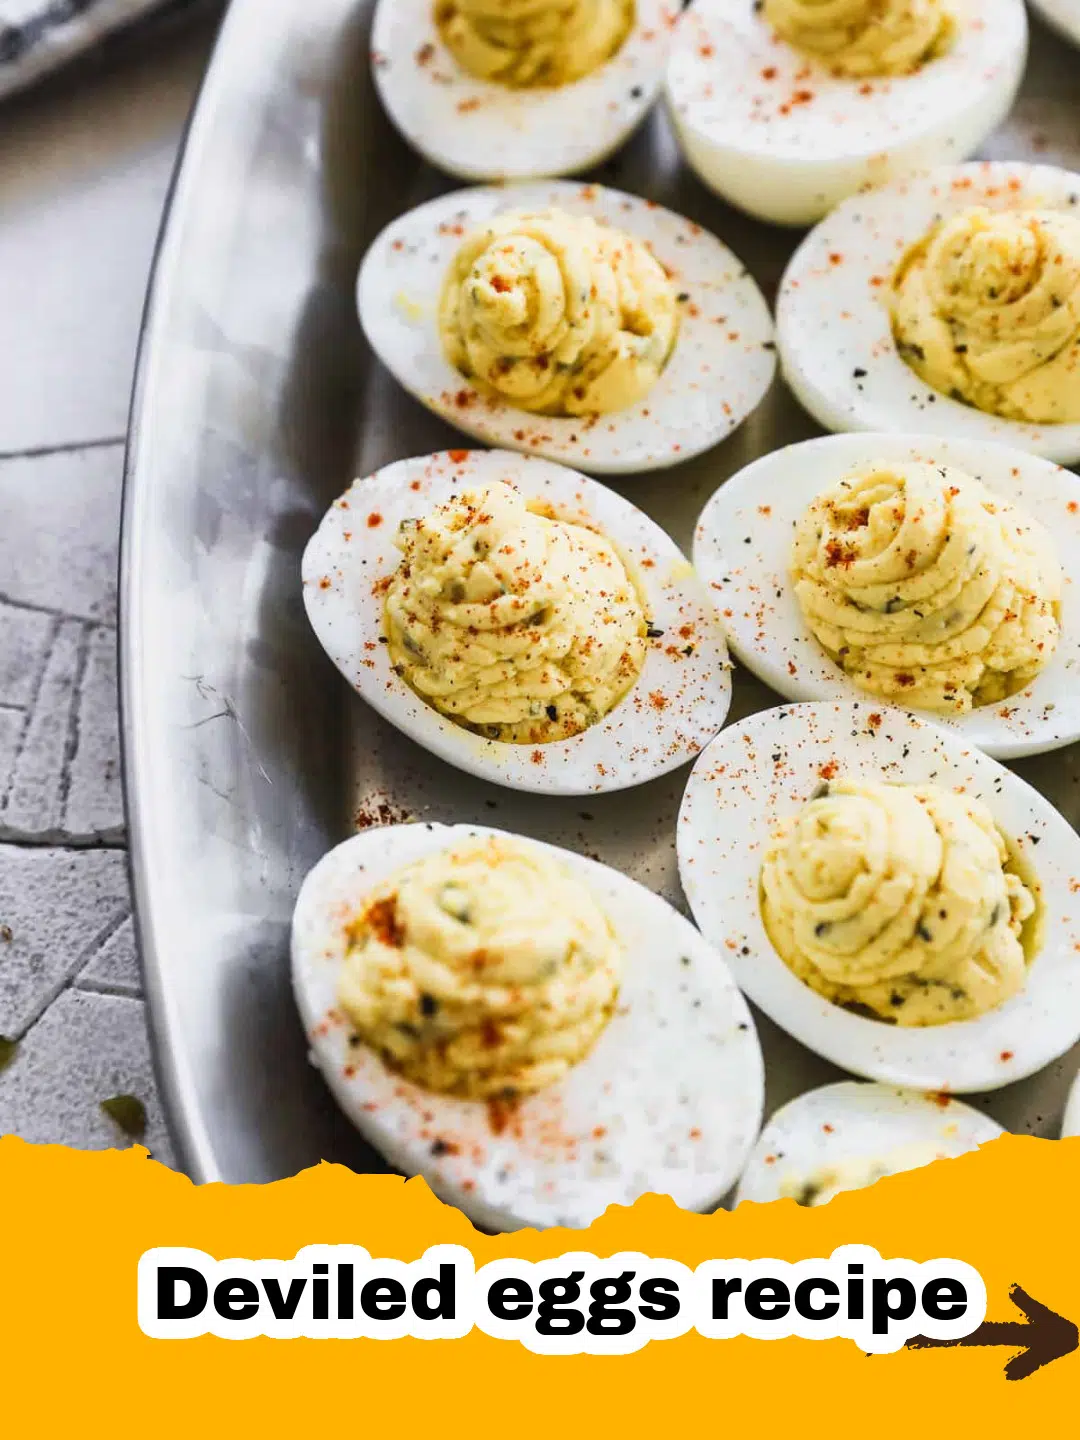
Step 7: Garnish and Chill. Lightly dust the filled deviled eggs with paprika for color and a subtle flavor. If desired, sprinkle with fresh chopped chives or dill for an extra touch of freshness and visual appeal. Arrange your beautiful deviled eggs on a serving platter. Cover loosely with plastic wrap and refrigerate for at least 30 minutes to allow the flavors to meld and the eggs to chill thoroughly. Chilling is key for the best deviled eggs recipe experience.
Step 8: Serve and Enjoy! Serve your classic creamy deviled eggs chilled. They are perfect as an appetizer for any occasion, from casual picnics to elegant brunches. They also pair wonderfully as a starter before a hearty meal like The Ultimate Classic Homestyle Meatloaf or alongside a fresh side like The Ultimate Garlic Parmesan Green Beans. Remember, this deviled eggs recipe is always a hit!
Variations & Serving Suggestions for Your Deviled Eggs Recipe
The beauty of a classic deviled eggs recipe is its versatility. While the traditional version is absolutely perfect as is, you can easily adapt it to suit different tastes or occasions. Don't be afraid to experiment and make this deviled eggs recipe your own!
Creative Variations:
- Spicy Kick: For those who love a bit of heat, mix in a dash of hot sauce (like Tabasco or Sriracha) or finely minced jalapeños (seeds removed for less heat) into the yolk filling. A pinch of extra cayenne pepper also works wonders for a spicier deviled eggs recipe.
- Bacon Lovers' Deviled Eggs: Crumble crispy, cooked bacon bits directly into the yolk mixture or sprinkle generously on top as a garnish. Bacon adds an incredible smoky, savory crunch that complements the creamy filling beautifully.
- Herby Freshness: Incorporate finely chopped fresh herbs like parsley, chives, dill, or tarragon into the filling for an added layer of aromatic flavor. This brightens the deviled eggs recipe and adds a lovely pop of green.
- Smoky Flavor: Swap regular paprika for smoked paprika (sweet or hot, depending on preference) for a deeper, more complex smoky note. A tiny drop of liquid smoke can also achieve this if used sparingly.
- Pickle Power: Finely dice sweet pickle relish or cornichons and fold them into the yolk mixture for an extra tangy and slightly sweet crunch. This is a classic twist on the deviled eggs recipe that many adore.
- Mediterranean Twist: Add a touch of finely minced sun-dried tomatoes, a pinch of dried oregano, and a tiny bit of feta cheese to the filling for a unique flavor profile.
Serving Suggestions:
- Appetizer Extravaganza: Deviled eggs are the quintessential party appetizer. Arrange them beautifully on a platter for holidays, potlucks, picnics, or any social gathering. They are always the first to disappear!
- Brunch Star: Serve them alongside other brunch favorites like quiches, fruit salads, and pastries. Their rich flavor complements lighter dishes perfectly.
- Picnic Perfect: Their portable nature makes them ideal for picnics and outdoor events. Just make sure to keep them chilled! Using a sturdy, lidded container from Basics Glass Food Storage is perfect for safe transport.
- Light Lunch: Pair a few deviled eggs with a simple green salad for a satisfying and protein-packed light lunch.
No matter how you choose to customize or serve your deviled eggs recipe, they are guaranteed to be a hit. Enjoy the process of creation and the delicious results!
Nutrition Information
Here's a breakdown of the nutritional content for one serving (2 halves) of this classic deviled eggs recipe. Please note that these are estimates and can vary based on specific ingredients and portion sizes.
| Nutrient | Amount per Serving |
|---|---|
| Calories | 90 kcal |
| Carbohydrates | 1g |
| Cholesterol | 185mg |
| Fat | 8g |
| Fiber | 0g |
| Protein | 5g |
| Saturated Fat | 2g |
| Serving Size | 2 halves |
| Sodium | 100mg |
| Sugar | 0g |
| Trans Fat | 0g |
| Unsaturated Fat | 5g |
Conclusion
And there you have it – the perfect classic deviled eggs recipe! This timeless appetizer is more than just a dish; it’s a little bite of joy, a conversation starter, and a true testament to simple ingredients creating extraordinary flavor. Whether you’re whipping them up for a family gathering, a festive holiday, or just a quiet afternoon snack, these creamy, tangy delights are sure to impress. Mastering this deviled eggs recipe means you'll always have a reliable, delicious option up your sleeve. So go ahead, crack those eggs, mix up that luscious filling, and share the love. Your taste buds (and your guests) will thank you for making this delightful deviled eggs recipe!
FAQs
How long do deviled eggs last in the fridge?
Deviled eggs are best enjoyed within 1-2 days of preparation. Store them in an airtight container in the refrigerator to maintain freshness and prevent them from drying out or absorbing other odors.
Can I make deviled eggs ahead of time?
Yes, you can prepare components of deviled eggs ahead of time. You can hard-boil the eggs up to 3 days in advance and store them unpeeled in the refrigerator. The yolk filling can also be made a day in advance and stored in an airtight container or piping bag in the fridge. Assemble the deviled eggs just a few hours before serving for the best texture and appearance.
What's the best way to peel hard-boiled eggs easily?
The key to easy peeling is to use eggs that are a bit older (about a week or more past their purchase date) and to plunge them immediately into an ice bath after cooking. The cold shock causes the egg whites to contract, separating them from the shell membrane. Cracking the egg all over and peeling under cool running water also helps.
Why do my deviled eggs turn watery?
Deviled eggs can become watery for a few reasons. Overcooking the eggs can lead to a crumbly, dry yolk that doesn't mix well. Using low-fat mayonnaise or adding too much vinegar can also contribute to a thinner consistency. Ensure your yolks are mashed smoothly and use full-fat mayonnaise for a creamy, stable filling. Avoid over-mixing the filling once it's creamy.

Classic Creamy Deviled Eggs
- Total Time: 35 minutes
- Yield: 12 servings (24 halves) 1x
Description
The ultimate classic deviled eggs recipe, featuring perfectly cooked yolks, a creamy, tangy filling, and a hint of spice. Perfect for potlucks, holidays, or any gathering!
Ingredients
1 dozen large eggs
1/2 cup mayonnaise (good quality)
1 tablespoon Dijon mustard
1 tablespoon white vinegar (or apple cider vinegar)
1/2 teaspoon salt
1/4 teaspoon black pepper
Pinch of cayenne pepper (optional, for a kick)
Paprika, for garnish
Fresh chives or dill, chopped, for garnish (optional)
Instructions
Step 1: Perfectly Boil Your Eggs. Carefully place one dozen large eggs in a single layer in a large saucepan. Add enough cold water to cover the eggs by at least one inch. Bring the water to a rolling boil over high heat. Once boiling, immediately turn off the heat, cover the pan with a lid, and let the eggs sit in the hot water for exactly 12-15 minutes. This method ensures perfectly cooked yolks without the green ring.
Step 2: Prepare an Ice Bath. While the eggs are sitting, prepare a large bowl with ice water. This ice bath is crucial for stopping the cooking process and making the eggs easier to peel. As soon as the 12-15 minutes are up, use a slotted spoon to transfer the hot eggs directly into the ice bath. Let them cool for at least 5-10 minutes, or until completely cool to the touch. This sudden temperature change helps the egg whites contract, making the shells much easier to remove.
Step 3: Peel the Eggs. Gently tap each cooled egg on a hard surface to crack the shell all over. Roll the egg between your hands to further loosen the shell. Starting from the larger end where the air pocket is, carefully peel the shell under cool running water. The water helps to wash away small shell fragments and makes the peeling smoother. Take your time to ensure the egg whites remain intact and smooth.
Step 4: Halve and Scoop. Once peeled, carefully slice each hard-boiled egg in half lengthwise with a sharp knife. Gently scoop out the bright yellow yolks into a medium-sized mixing bowl. Place the egg white halves on a platter, ready for filling.
Step 5: Create the Creamy Filling. Using a fork, thoroughly mash the egg yolks in the mixing bowl until they are completely smooth and free of lumps. Add the mayonnaise, Dijon mustard, white vinegar, salt, and black pepper to the mashed yolks. If you like a little heat, add a pinch of cayenne pepper now. Mix all the ingredients together vigorously until the filling is perfectly smooth, creamy, and well combined. Taste and adjust seasonings if necessary.
Step 6: Fill the Egg Whites. Transfer the creamy yolk mixture into a piping bag fitted with a star tip (or a Ziploc bag with a corner snipped off) and pipe the filling neatly into each egg white half, creating an attractive swirl or dome. Alternatively, simply use a small spoon to mound the filling generously into each egg white cavity.
Step 7: Garnish and Chill. Lightly dust the filled deviled eggs with paprika for color and a subtle flavor. If desired, sprinkle with fresh chopped chives or dill for an extra touch of freshness and visual appeal. Arrange your beautiful deviled eggs on a serving platter. Cover loosely with plastic wrap and refrigerate for at least 30 minutes to allow the flavors to meld and the eggs to chill thoroughly.
Step 8: Serve and Enjoy! Serve your classic creamy deviled eggs chilled. They are perfect as an appetizer for any occasion.
Notes
For the easiest peeling, use eggs that are at least a week old. Older eggs tend to peel more cleanly than very fresh ones.
- Prep Time: 20 minutes
- Cook Time: 15 minutes
- Category: Appetizer
- Cuisine: American
Nutrition
- Serving Size: 2 halves
- Calories: 90 kcal
- Sugar: 0g
- Sodium: 100mg
- Fat: 8g
- Saturated Fat: 2g
- Unsaturated Fat: 5g
- Trans Fat: 0g
- Carbohydrates: 1g
- Fiber: 0g
- Protein: 5g
- Cholesterol: 185mg
Leave a Reply