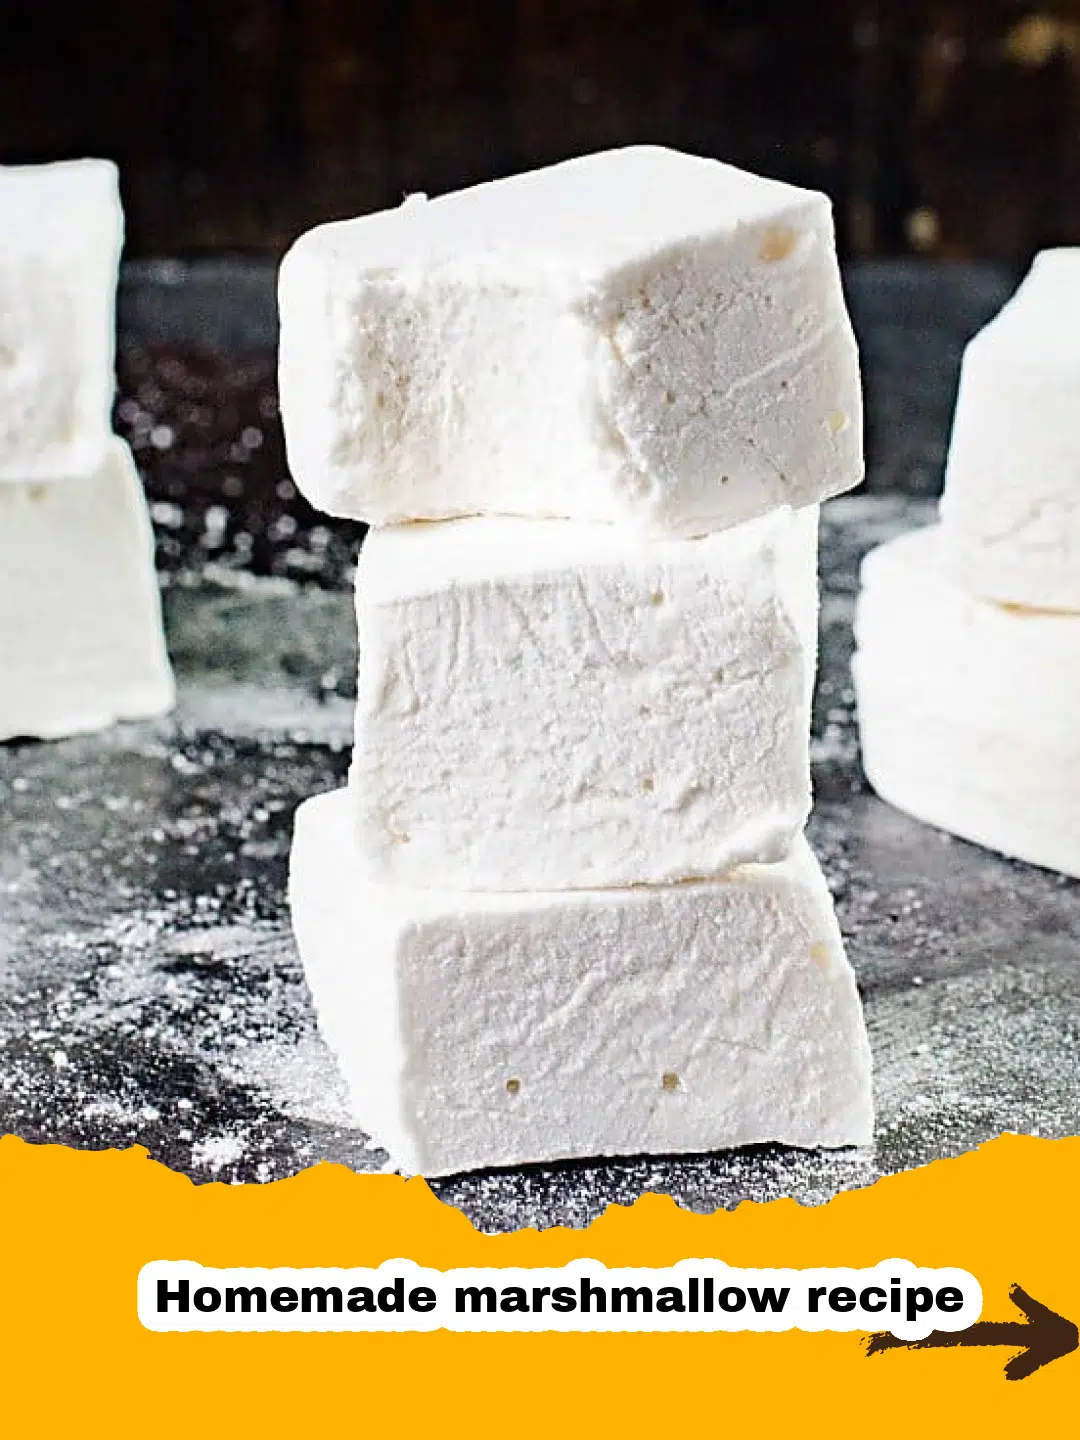
There's something incredibly nostalgic about marshmallows, isn't there? For years, my marshmallow experience was limited to the store-bought variety – perfectly cylindrical, slightly rubbery, and a classic staple for s'mores around the campfire. They were good, don't get me wrong, but they never quite captured the ethereal dreaminess I imagined marshmallows could be. Then, one crisp autumn afternoon, a friend brought over a batch of her own, and my world changed. These weren't just marshmallows; they were clouds of vanilla-scented sweetness, melting on the tongue with an almost magical delicacy. That day, I was initiated into the cult of the **homemade marshmallow recipe**, and I've never looked back. The process seemed daunting at first, a magical alchemy best left to seasoned confectioners. But I quickly discovered that making your own marshmallows is not only surprisingly simple but also incredibly rewarding. The aroma alone, as the vanilla-infused sugar syrup whips into fluffy peaks, is enough to transform your kitchen into a sweet-scented haven. And the taste? Absolutely incomparable. Forget everything you thought you knew about marshmallows. Prepare for a revelation that will elevate your hot chocolate, s'mores, and dessert game to an entirely new level.
Why This Homemade Marshmallow Recipe is a Must-Try
- Unbeatable Freshness and Flavor: The difference between homemade and store-bought is like night and day. Fresh marshmallows have an incredibly clean, vibrant flavor that store-bought versions simply can't replicate.
- Pillowy, Melt-in-Your-Mouth Texture: These aren't rubbery; they're delicate, airy, and literally melt on your tongue, leaving behind a wonderful sweet finish.
- No Mystery Ingredients: You control exactly what goes into them – just a few simple, wholesome ingredients you likely already have in your pantry.
- Impressive (Yet Easy!) Gift: A batch of these beautiful, fluffy squares makes an incredibly thoughtful and impressive homemade gift for friends and family during the holidays or any special occasion.
- Versatility: Perfect for hot chocolate, s'mores, holiday treats, or simply enjoying on their own as a delightful sweet snack. This **homemade marshmallow recipe** is a game-changer for dessert lovers!
Key Ingredient Notes for Perfect Homemade Marshmallows
Gelatin: The Foundation of Fluff
Gelatin is the unsung hero of this **homemade marshmallow recipe**. It's what gives your marshmallows their structure and signature bounce. We're using unflavored powdered gelatin, readily available in most grocery stores. The most crucial step with gelatin is blooming it correctly. This involves sprinkling it over cold water and letting it sit for about five minutes until it absorbs the water and swells. This ensures it dissolves smoothly when heated, preventing any grainy texture in your final product. Don't rush this step, and always use cold water to prevent it from clumping.
Sugar and Corn Syrup: The Sweet Symphony
The combination of granulated sugar and light corn syrup is essential for achieving the right sweetness and texture. The corn syrup isn't just for sweetness; it plays a vital role in preventing the sugar from crystallizing, which can lead to grainy marshmallows. When cooking the sugar syrup, it's crucial to reach the exact temperature specified (240°F / 115°C, or the soft-ball stage). Using a reliable candy thermometer is non-negotiable here. Undercooking will result in a syrup that's too thin, yielding runny marshmallows, while overcooking can make them too hard or brittle. Precision is key for this **homemade marshmallow recipe**!
Vanilla Extract: The Soul of Sweetness
While often an afterthought, the quality of your vanilla extract significantly impacts the final flavor of your homemade marshmallows. Since this is one of the primary flavors, invest in a good quality pure vanilla extract. You'll add it at the end of the whipping process to preserve its delicate aroma and prevent it from evaporating in the heat of the sugar syrup. For an extra special touch, consider using vanilla bean paste for visible specks of vanilla bean and an even richer flavor profile in your **homemade marshmallow recipe**.
Step-by-Step Guide with Pro Tips for Your Homemade Marshmallow Recipe
Making your own marshmallows is a rewarding process that yields incredible results. Here’s a detailed walkthrough to ensure your success:
Preparation is Key
- Grease Your Pan: Choose a 9x13-inch baking dish. Lightly grease it with butter or a neutral oil spray.
- Dust with Confectioners' Sugar and Cornstarch: In a small bowl, whisk together 1/2 cup confectioners' sugar and 1/2 cup cornstarch. Heavily dust the greased pan with this mixture, ensuring all surfaces are covered. This non-stick coating is vital! Set aside.
- Prep Your Stand Mixer: Attach the whisk attachment to your stand mixer. This will do all the heavy lifting for whipping.
Making the Marshmallow Base
- Step 1: Bloom the Gelatin. In the bowl of your stand mixer, sprinkle the 3 packets (about 2.5 tablespoons) of unflavored gelatin over 1/2 cup cold water. Let it sit for 5-7 minutes to bloom and soften. Do not stir it; just let it hydrate naturally.
- Step 2: Prepare the Sugar Syrup. In a heavy-bottomed saucepan, combine the 2 cups granulated sugar, 1/2 cup light corn syrup, and 1/2 cup water. Stir gently to combine before placing it over medium-high heat.
- Step 3: Cook the Syrup. Insert a candy thermometer into the syrup, ensuring it doesn't touch the bottom of the pan. Bring the mixture to a boil without stirring. Cook until the syrup reaches precisely 240°F (115°C), the soft-ball stage. This usually takes 8-12 minutes.
- Step 4: Whip the Gelatin. As soon as the sugar syrup reaches temperature, immediately remove it from the heat. Start your stand mixer on low speed to gently begin whipping the bloomed gelatin.
- Step 5: Slowly Add Hot Syrup. With the mixer still on low speed, carefully and slowly pour the hot sugar syrup in a thin, steady stream down the side of the bowl, avoiding the whisk. Be very careful as the syrup is extremely hot.
- Step 6: Increase Speed and Whip. Once all the syrup has been added, increase the mixer speed to medium-high (around 8 on a KitchenAid). Continue to whip for 10-15 minutes, or until the mixture is very thick, glossy, nearly tripled in volume, and forms stiff peaks. The bowl should feel warm to the touch, not hot.
- Step 7: Add Vanilla. Reduce the mixer speed to low and add 1 tablespoon of vanilla extract. Mix for just 30 seconds until fully incorporated. Overmixing vanilla can cause it to lose flavor.
Setting and Finishing
- Step 8: Pour into Prepared Pan. Quickly, before the mixture sets too much, pour the marshmallow mixture into your prepared 9x13-inch pan. It will be very sticky.
- Step 9: Smooth the Top. Lightly grease an offset spatula or your hands with cooking spray or butter. Gently spread the marshmallow evenly into the pan. This **homemade marshmallow recipe** requires a quick hand here!
- Step 10: Let it Set. Dust the top of the marshmallow with an additional generous layer of the confectioners' sugar/cornstarch mixture. Leave the pan uncovered at room temperature for at least 4 hours, or preferably overnight, until firm and no longer sticky.
- Step 11: Cut and Coat. Once set, invert the marshmallow onto a clean cutting board heavily dusted with the confectioners' sugar/cornstarch mixture. Using a sharp, lightly oiled knife or a pizza cutter, cut the marshmallow into desired shapes and sizes (e.g., 1-inch squares).
- Step 12: Final Dusting. Toss the cut marshmallows gently in the remaining confectioners' sugar/cornstarch mixture, ensuring all sticky sides are coated. Shake off any excess. This ensures they don't stick together. Your perfect **homemade marshmallow recipe** is almost complete!
Pro Tips for Your Best Homemade Marshmallow Recipe:
- Don't Skimp on the Sugar/Cornstarch Dusting: This is your best friend against stickiness. Be generous!
- Humidity Matters: Marshmallows are sensitive to humidity. Choose a dry day if possible for making them.
- Clean Tools: Keep your spatula and knife lightly oiled for easy cutting and handling.
- Storage: Store your beautiful **homemade marshmallow recipe** creations in an airtight container at room temperature for up to 2-3 weeks. For optimal freshness and to prevent them from drying out, I highly recommend storing them in Basics Glass Food Storage containers. They keep air out and freshness in!
- Experiment with Flavors: Once you've mastered the classic vanilla, try adding other extracts like peppermint, almond, or even a touch of coffee.
Variations & Serving Suggestions for Your Homemade Marshmallow Recipe
This isn't just a **homemade marshmallow recipe**; it's a foundation for endless delicious possibilities! Once you've mastered the basic vanilla, get creative:
- Peppermint Marshmallows: Replace vanilla extract with peppermint extract. These are divine stirred into homemade hot chocolate during the holidays.
- Coffee or Espresso Marshmallows: Add 1-2 teaspoons of instant espresso powder or strong coffee extract with the vanilla. Fantastic with your morning coffee!
- Citrus Zest: Fold in 1-2 tablespoons of finely grated lemon, orange, or lime zest at the end of whipping for a bright, zesty flavor.
- Chocolate Swirl: Drizzle melted chocolate over the marshmallow in the pan before it sets, then swirl gently with a skewer.
- Colored Marshmallows: Add a few drops of food coloring with the vanilla for festive treats.
- Unique Shapes: Instead of squares, use cookie cutters to create fun shapes like hearts, stars, or even little gingerbread men to accompany your soft & chewy gingerbread cookies.
Serving Suggestions:
- Hot Chocolate Companion: The absolute classic! These melt beautifully into a warm mug of cocoa.
- Gourmet S'mores: Elevate your s'mores game with homemade marshmallows, quality chocolate, and graham crackers.
- Dessert Topping: Use them to top sweet potato casserole, fruit salads, or even ice cream sundaes.
- Edible Gifts: Package them in pretty bags with ribbons for a delightful homemade present.
- In Baking: Cube them and fold into brownies or cookie dough for a chewy surprise.
Nutrition Information
| Nutrient | Amount Per Serving |
|---|---|
| Calories | 80 kcal |
| Carbohydrate Content | 20g |
| Cholesterol Content | 0mg |
| Fat Content | 0g |
| Fiber Content | 0g |
| Protein Content | 2g |
| Saturated Fat Content | 0g |
| Serving Size | 1 marshmallow (approx. 1 oz) |
| Sodium Content | 5mg |
| Sugar Content | 18g |
| Trans Fat Content | 0g |
| Unsaturated Fat Content | 0g |
Conclusion
There you have it – your comprehensive guide to mastering the art of the **homemade marshmallow recipe**. From blooming gelatin to the final dusty coating, each step brings you closer to a sweet, cloud-like confection that will truly impress. This simple yet elegant treat is a testament to the magic that happens when a few basic ingredients are combined with a little love and patience. So, gather your ingredients, fire up that stand mixer, and prepare to create the most divine, pillowy marshmallows you've ever tasted. Your taste buds (and your friends and family) will thank you for bringing this touch of homemade sweetness into your life. Enjoy the journey of making and savoring your very own **homemade marshmallow recipe**!
FAQs
Why are my homemade marshmallows sticky?
Stickiness is a common issue with a homemade marshmallow recipe. It's usually due to insufficient dusting with the confectioners' sugar and cornstarch mixture. Ensure your pan is heavily coated and that you generously dust the top before setting, and then toss the cut marshmallows thoroughly in the mixture. High humidity can also contribute to stickiness, so try to make them on a dry day.
How long do homemade marshmallows last and how should I store them?
Homemade marshmallows will last for about 2-3 weeks when stored properly. Keep them in an airtight container at room temperature, away from direct sunlight or heat. Avoid refrigerating them, as this can make them hard and chewy. For the best freshness, ensure they are well-coated in the cornstarch-sugar mixture before storing.
Can I make flavored homemade marshmallows?
Absolutely! This homemade marshmallow recipe is very versatile. You can easily add other extracts like peppermint, almond, coffee, or even lemon/orange zest during the last step of whipping, just after the vanilla. Start with 1/2 to 1 teaspoon of a new extract and adjust to your taste. For chocolate marshmallows, you could melt in some unsweetened cocoa powder with the hot syrup.
My marshmallows didn't get fluffy. What went wrong?
Several factors can prevent your homemade marshmallow recipe from becoming fluffy. The most common reasons are not whipping the mixture long enough (it needs to be very thick, glossy, and form stiff peaks), or the sugar syrup not reaching the correct temperature (240u00b0F / 115u00b0C). Ensure your gelatin bloomed properly as well. A stand mixer with a whisk attachment is crucial for achieving the necessary aeration and volume.
Homemade Marshmallows
- Total Time: 4 hours 40 minutes (including setting time)
- Yield: 36-48 marshmallows (1-inch squares) 1x
Description
Experience the ultimate in soft, pillowy sweetness with this easy-to-follow homemade marshmallow recipe. Far superior to store-bought, these airy vanilla clouds are perfect for hot chocolate, s'mores, or simply enjoying as a delightful treat.
Ingredients
3 packets (about 2.5 tablespoons) unflavored gelatin
1/2 cup cold water (for gelatin)
2 cups granulated sugar
1/2 cup light corn syrup
1/2 cup water (for sugar syrup)
1 tablespoon vanilla extract
1/2 cup confectioners' sugar (for dusting)
1/2 cup cornstarch (for dusting)
Instructions
Step 1: Lightly grease a 9x13-inch baking dish with butter or cooking spray. In a small bowl, whisk together 1/2 cup confectioners' sugar and 1/2 cup cornstarch. Heavily dust the greased pan with this mixture, ensuring all surfaces are covered. Set aside.
Step 2: In the bowl of a stand mixer, sprinkle the 3 packets of unflavored gelatin over 1/2 cup cold water. Let it sit for 5-7 minutes to bloom and soften. Do not stir.
Step 3: In a heavy-bottomed saucepan, combine the 2 cups granulated sugar, 1/2 cup light corn syrup, and 1/2 cup water. Stir gently to combine before placing it over medium-high heat.
Step 4: Insert a candy thermometer into the syrup, ensuring it doesn't touch the bottom of the pan. Bring the mixture to a boil without stirring. Cook until the syrup reaches precisely 240°F (115°C), the soft-ball stage.
Step 5: As soon as the sugar syrup reaches temperature, immediately remove it from the heat. Attach the whisk attachment to your stand mixer and start mixing the bloomed gelatin on low speed.
Step 6: With the mixer still on low speed, carefully and slowly pour the hot sugar syrup in a thin, steady stream down the side of the bowl, avoiding the whisk. Be very careful as the syrup is extremely hot.
Step 7: Once all the syrup has been added, increase the mixer speed to medium-high (around 8 on a KitchenAid). Continue to whip for 10-15 minutes, or until the mixture is very thick, glossy, nearly tripled in volume, and forms stiff peaks. The bowl should feel warm to the touch, not hot.
Step 8: Reduce the mixer speed to low and add 1 tablespoon of vanilla extract. Mix for just 30 seconds until fully incorporated.
Step 9: Quickly, before the mixture sets too much, pour the marshmallow mixture into your prepared 9x13-inch pan. It will be very sticky.
Step 10: Lightly grease an offset spatula or your hands with cooking spray or butter. Gently spread the marshmallow evenly into the pan.
Step 11: Dust the top of the marshmallow with an additional generous layer of the confectioners' sugar/cornstarch mixture. Leave the pan uncovered at room temperature for at least 4 hours, or preferably overnight, until firm and no longer sticky.
Step 12: Once set, invert the marshmallow onto a clean cutting board heavily dusted with the confectioners' sugar/cornstarch mixture. Using a sharp, lightly oiled knife or a pizza cutter, cut the marshmallow into desired shapes and sizes (e.g., 1-inch squares).
Step 13: Toss the cut marshmallows gently in the remaining confectioners' sugar/cornstarch mixture, ensuring all sticky sides are coated. Shake off any excess. Store in an airtight container at room temperature for up to 2-3 weeks.
Notes
Ensure your candy thermometer is accurate for best results. Humidity can affect setting time; avoid making these on very humid days. For different flavors, replace or supplement vanilla with other extracts like peppermint or almond.
- Prep Time: 25 minutes
- Cook Time: 15 minutes
- Category: Dessert
- Cuisine: American
Nutrition
- Serving Size: 1 marshmallow (approx. 1 oz)
- Calories: 80 kcal
- Sugar: 18g
- Sodium: 5mg
- Fat: 0g
- Saturated Fat: 0g
- Unsaturated Fat: 0g
- Trans Fat: 0g
- Carbohydrates: 20g
- Fiber: 0g
- Protein: 2g
- Cholesterol: 0mg
Leave a Reply