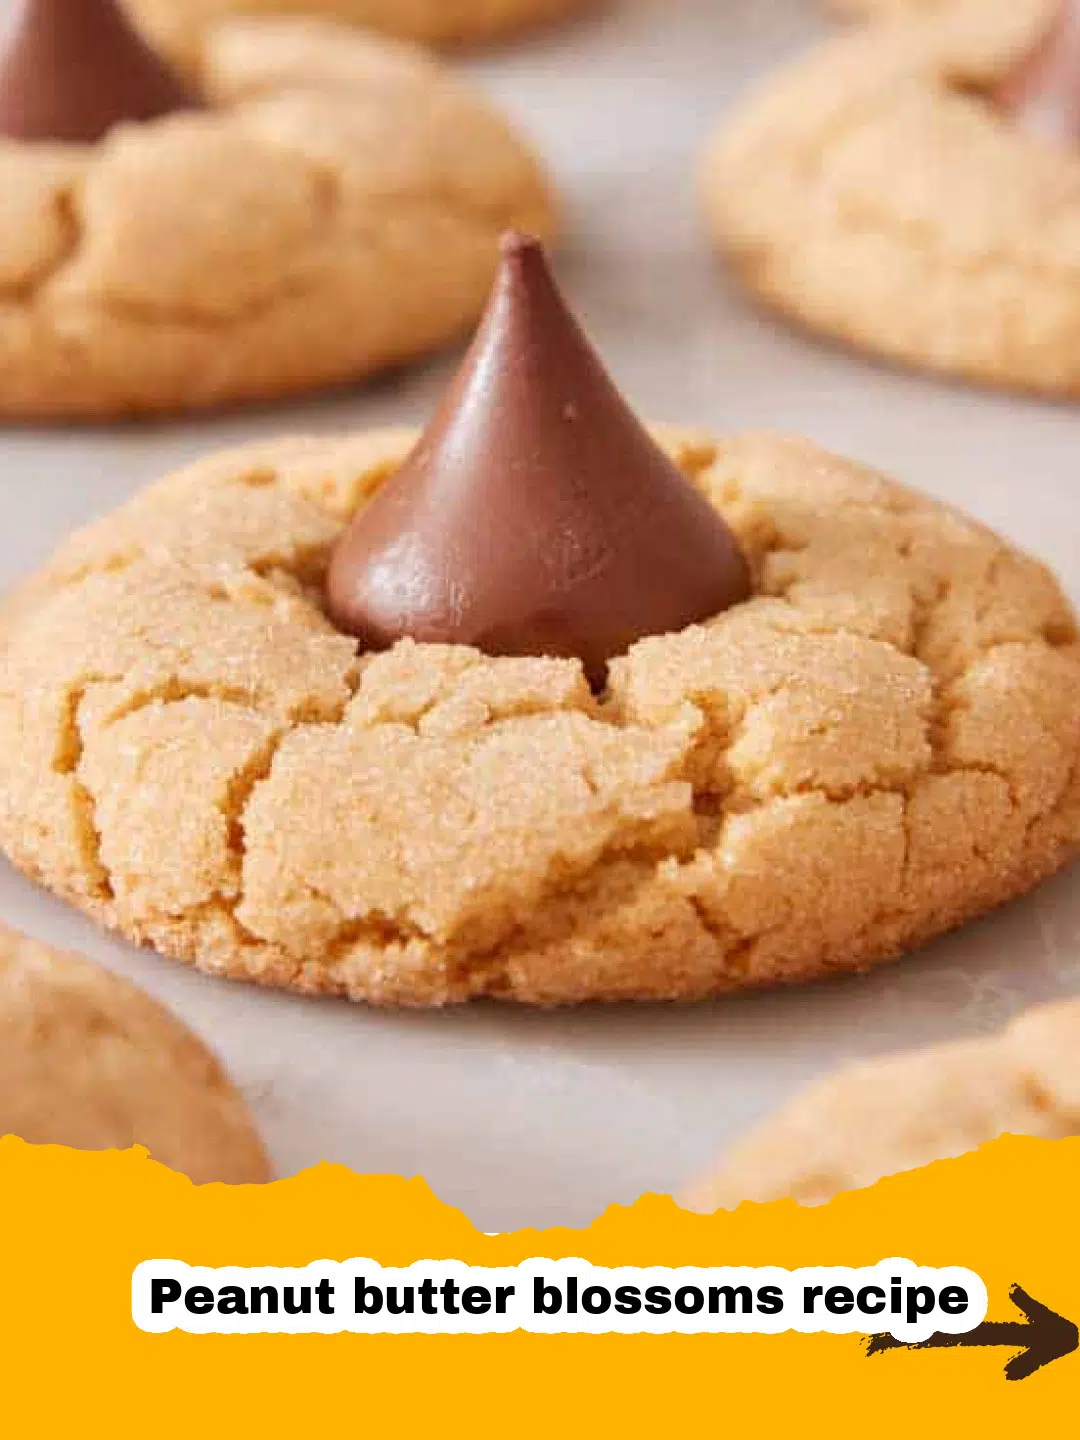
Growing up, the scent of baking cookies was the true harbinger of the holiday season in our home. My grandmother, a true kitchen alchemist, had a repertoire of treasured recipes, but none held a candle to her legendary Peanut butter blossoms recipe. It wasn't just a cookie; it was a tangible memory, a warm embrace, a pure taste of unadulterated joy. I can vividly recall her flour-dusted hands, meticulously shaping each dough ball before gently rolling it in sparkling sugar, and then, with utmost care, pressing a Hershey's Kiss into its warm, freshly baked center. The way the chocolate would soften and melt, creating that iconic crinkled peak – it was nothing short of magical. This humble yet profound cookie quickly became an indispensable part of our family traditions, a delightful treat we anticipated with eager hearts every single year. Even now, decades later, the distinct aroma of freshly baked Peanut butter blossoms recipe transports me instantly back to her cozy kitchen, a place perpetually filled with laughter, love, and the sweet scent of holiday cheer. It's a flavor that transcends time, and today, I'm overjoyed to share her cherished Peanut butter blossoms recipe with you, hoping it sparks similar joyous traditions in your own home.
Why This Peanut Butter Blossoms Recipe is a Must-Try
This classic Peanut butter blossoms recipe isn't just another cookie; it's a timeless gem that consistently delivers on taste, texture, and pure nostalgic delight. If you're looking for a reason to dust off your mixing bowl, here are a few compelling ones:
- The Perfect Sweet and Salty Harmony: The rich, savory notes of peanut butter are beautifully complemented by the sweet, creamy milk chocolate kiss. This iconic pairing creates a flavor explosion that's incredibly satisfying without being overly rich, making this Peanut butter blossoms recipe utterly addictive.
- Irresistibly Soft and Chewy Texture: Forget dry, crumbly cookies! This recipe yields a gloriously soft and delightfully chewy peanut butter base that practically melts in your mouth. The slightly crisp sugar coating adds another layer of texture, making every bite a complex experience.
- A Beloved Holiday Staple (and Beyond!): While often associated with Christmas cookie platters, the Peanut butter blossoms recipe is truly a year-round treat. It brings a festive cheer to any occasion, from potlucks and bake sales to quiet evenings at home with a cup of tea.
- Surprisingly Simple to Master: Don't let its iconic status intimidate you. This Peanut butter blossoms recipe is remarkably straightforward, making it perfect for bakers of all skill levels. With clear instructions and a few pro tips, you'll be whipping up batches of these beauties in no time.
Key Ingredient Notes for Your Perfect Peanut Butter Blossoms Recipe
The beauty of a classic like the Peanut butter blossoms recipe lies in its simplicity, but a few key ingredients require attention to ensure your cookies turn out perfectly every time. Paying mind to these details will elevate your baking from good to absolutely glorious.
Peanut Butter Perfection
When it comes to peanut butter, consistency is crucial for this Peanut butter blossoms recipe. I highly recommend using a creamy, processed peanut butter (like Jif or Skippy) rather than natural, oil-separated varieties. Natural peanut butter tends to be drier and can lead to a crumbly dough that doesn't hold its shape as well. The added oils and sugars in processed peanut butter contribute to the cookies' signature soft and chewy texture. If you only have natural peanut butter, you might need to adjust the flour slightly or ensure it's extremely well-stirred to integrate the oils.
The Right Butter, The Right Temperature
Unsalted butter is always my preference in baking, as it gives you control over the overall saltiness of the Peanut butter blossoms recipe. More importantly, ensure your butter is at true room temperature. This means it should be soft enough to indent easily with your finger but not melted or greasy. Room temperature butter creams beautifully with the sugars, creating a light, airy base that is essential for a tender cookie. Cold butter won't emulsify properly, and melted butter will lead to greasy, flat cookies.
The Sweetness Factor: Sugars
This Peanut butter blossoms recipe calls for a combination of granulated sugar and brown sugar. Granulated sugar provides crispness and contributes to the golden-brown color. Brown sugar, on the other hand, is a secret weapon for chewiness and moisture, thanks to its molasses content. Don't skip or substitute it! When rolling the dough balls, a final coating of granulated sugar not only adds sparkle but also helps prevent the cookies from spreading too much and gives them that delightful crinkled texture once the kiss is pressed in.
The Iconic Chocolate Kiss
Of course, no Peanut butter blossoms recipe is complete without the iconic Hershey's Kisses. While other chocolates can be used, the classic Kiss provides the perfect size, shape, and melting consistency for the signature 'blossom' look. Make sure your Kisses are unwrapped and ready to go *before* the cookies come out of the oven, as timing is key to getting that perfect, slightly melted press. Keep them cool until ready to use to prevent them from melting too much too soon.
Step-by-Step Guide with Pro Tips for the Best Peanut Butter Blossoms Recipe
Crafting the perfect Peanut butter blossoms recipe is a delightful process. Follow these steps carefully, and you’ll be rewarded with a batch of irresistible cookies that will disappear faster than you can say “Happy Holidays!”
Gather Your Tools and Ingredients
Before you begin, ensure all your ingredients are measured and ready. Bring butter and eggs to room temperature. This simple step makes a world of difference in the final texture of your cookies. Have your Hershey’s Kisses unwrapped and nearby. For easy cleanup and perfectly baked cookies, I highly recommend using parchment paper on your baking sheets. For storing any leftover cookies (though there likely won't be many!), consider using reliable airtight containers, like these Basics Glass Food Storage containers, to maintain freshness.
Prepare Your Dry and Wet Ingredients
Step 1: In a medium bowl, whisk together the all-purpose flour, baking soda, and salt. Set aside. This ensures all the leavening and seasoning are evenly distributed throughout your Peanut butter blossoms recipe dough.
Step 2: In a large bowl, using an electric mixer, cream together the softened unsalted butter, granulated sugar, and packed light brown sugar until the mixture is light and fluffy. This usually takes about 2-3 minutes on medium-high speed. Scrape down the sides of the bowl as needed. Proper creaming incorporates air, which contributes to the cookies' light texture.
Step 3: Beat in the creamy peanut butter until well combined and smooth, again scraping down the sides of the bowl. Ensure no lumps remain from the peanut butter. This is a crucial step for achieving the distinct flavor of a Peanut butter blossoms recipe.
Step 4: Add the large egg and vanilla extract to the wet ingredients and beat until just combined. Be careful not to overmix at this stage, as overmixing can lead to a tougher cookie. Just mix until the egg is fully incorporated.
Combine and Chill the Dough (If Needed)
Step 5: Gradually add the dry ingredients to the wet ingredients, mixing on low speed until just combined. Do not overmix the dough once the flour is added; overmixing develops gluten, which can make your cookies tough. The dough for this Peanut butter blossoms recipe should be soft but pliable.
Pro Tip: If your kitchen is warm or your dough feels a little too sticky to roll easily, cover the bowl with plastic wrap and chill it in the refrigerator for 20-30 minutes. This will make handling much easier and can prevent the cookies from spreading too much. However, often with this Peanut butter blossoms recipe, chilling isn't strictly necessary if your ingredients were at the right temperature.
Roll and Bake
Step 6: Preheat your oven to 375°F (190°C). Prepare two baking sheets by lining them with parchment paper or silicone mats. Place about half a cup of granulated sugar in a shallow bowl for rolling.
Step 7: Scoop the dough using a small cookie scoop (about 1.5 tablespoons) or roll it into 1-inch balls with your hands. Roll each dough ball generously in the granulated sugar until completely coated. Place the sugar-coated balls about 2 inches apart on the prepared baking sheets. This careful rolling is part of what makes the Peanut butter blossoms recipe so visually appealing.
Step 8: Bake for 8-10 minutes, or until the edges are lightly golden and the centers are just set. The cookies should still look slightly soft in the middle. Baking time can vary by oven, so keep a close eye on them. Overbaking will result in dry, crumbly cookies, which we want to avoid for the perfect Peanut butter blossoms recipe.
The Signature Touch
Step 9: Immediately upon removing the cookies from the oven, gently press one unwrapped Hershey's Kiss into the center of each warm cookie. The warmth of the cookie will slightly melt the chocolate, allowing it to adhere and create that iconic
FAQs
What kind of peanut butter is best for Peanut Butter Blossoms?
Creamy, processed peanut butter (like Jif or Skippy) is generally recommended for the classic Peanut Butter Blossoms recipe. Avoid natural peanut butter that separates easily, as it can make the dough too oily or crumbly and affect the cookie's texture.
Why are my Peanut Butter Blossoms flat or hard?
Flat cookies can be due to over-softened butter, too little flour, or an oven temperature that's too low. Hard cookies often result from overbaking. Ensure your butter is just softened (not melted), measure flour accurately (spoon and level!), and watch the baking time closely u2013 they should still look slightly soft in the center when removed from the oven.
Can I freeze Peanut Butter Blossoms?
Yes, Peanut Butter Blossoms freeze beautifully! Once completely cooled and the chocolate has fully set, store them in an airtight freezer-safe container or bag. They can be frozen for up to 2-3 months. Thaw them at room temperature for an hour or two before serving.
What can I use if I don't have Hershey's Kisses for this Peanut Butter Blossoms recipe?
While Hershey's Kisses are traditional, you can substitute them with mini peanut butter cups, chocolate star candies, or even a small square of your favorite chocolate bar pressed into the warm cookie. For a different twist, try white chocolate or caramel-filled chocolates.
Classic Peanut Butter Blossoms
- Total Time: 30 minutes
- Yield: About 3 dozen cookies 1x
Description
A timeless, melt-in-your-mouth Peanut Butter Blossoms recipe featuring soft, chewy peanut butter cookies rolled in sugar and topped with a creamy chocolate kiss. Perfect for holidays or any time you crave a comforting treat.
Ingredients
1 ¾ cups all-purpose flour
1 teaspoon baking soda
½ teaspoon salt
½ cup (1 stick) unsalted butter, softened
½ cup granulated sugar, plus extra for rolling
½ cup packed light brown sugar
½ cup creamy peanut butter (not natural)
1 large egg
1 teaspoon vanilla extract
36 Hershey's Kisses, unwrapped
Instructions
Step 1: In a medium bowl, whisk together the all-purpose flour, baking soda, and salt. Set aside.
Step 2: In a large bowl, using an an electric mixer, cream together the softened unsalted butter, ½ cup granulated sugar, and light brown sugar until light and fluffy (about 2-3 minutes).
Step 3: Beat in the creamy peanut butter until well combined and smooth.
Step 4: Add the egg and vanilla extract, beating until just combined.
Step 5: Gradually add the dry ingredients to the wet ingredients, mixing on low speed until just combined. Do not overmix.
Step 6: Preheat your oven to 375°F (190°C). Line two baking sheets with parchment paper. Place about ½ cup granulated sugar in a shallow bowl for rolling.
Step 7: Scoop the dough using a small cookie scoop (about 1.5 tablespoons) or roll into 1-inch balls. Roll each ball generously in the granulated sugar until completely coated. Place cookies about 2 inches apart on the prepared baking sheets.
Step 8: Bake for 8-10 minutes, or until the edges are lightly golden and the centers are just set. They should still look slightly soft in the middle.
Step 9: Immediately upon removing the cookies from the oven, gently press one unwrapped Hershey's Kiss into the center of each warm cookie.
Step 10: Let the cookies cool on the baking sheets for 5-10 minutes to allow the chocolate to set slightly, then transfer them to a wire rack to cool completely. Store in an airtight container at room temperature.
Notes
For best results, ensure butter and eggs are at room temperature. Don't overbake these cookies – they should be just set at the edges for maximum chewiness. If dough is too sticky, chill for 20-30 minutes.
- Prep Time: 20 minutes
- Cook Time: 10 minutes
- Category: Dessert
- Cuisine: American
Nutrition
- Serving Size: 1 cookie
- Calories: 160 kcal
- Sugar: 12g
- Sodium: 120mg
- Fat: 8g
- Saturated Fat: 4g
- Unsaturated Fat: 4g
- Trans Fat: 0g
- Carbohydrates: 19g
- Fiber: 1g
- Protein: 3g
- Cholesterol: 20mg
Leave a Reply