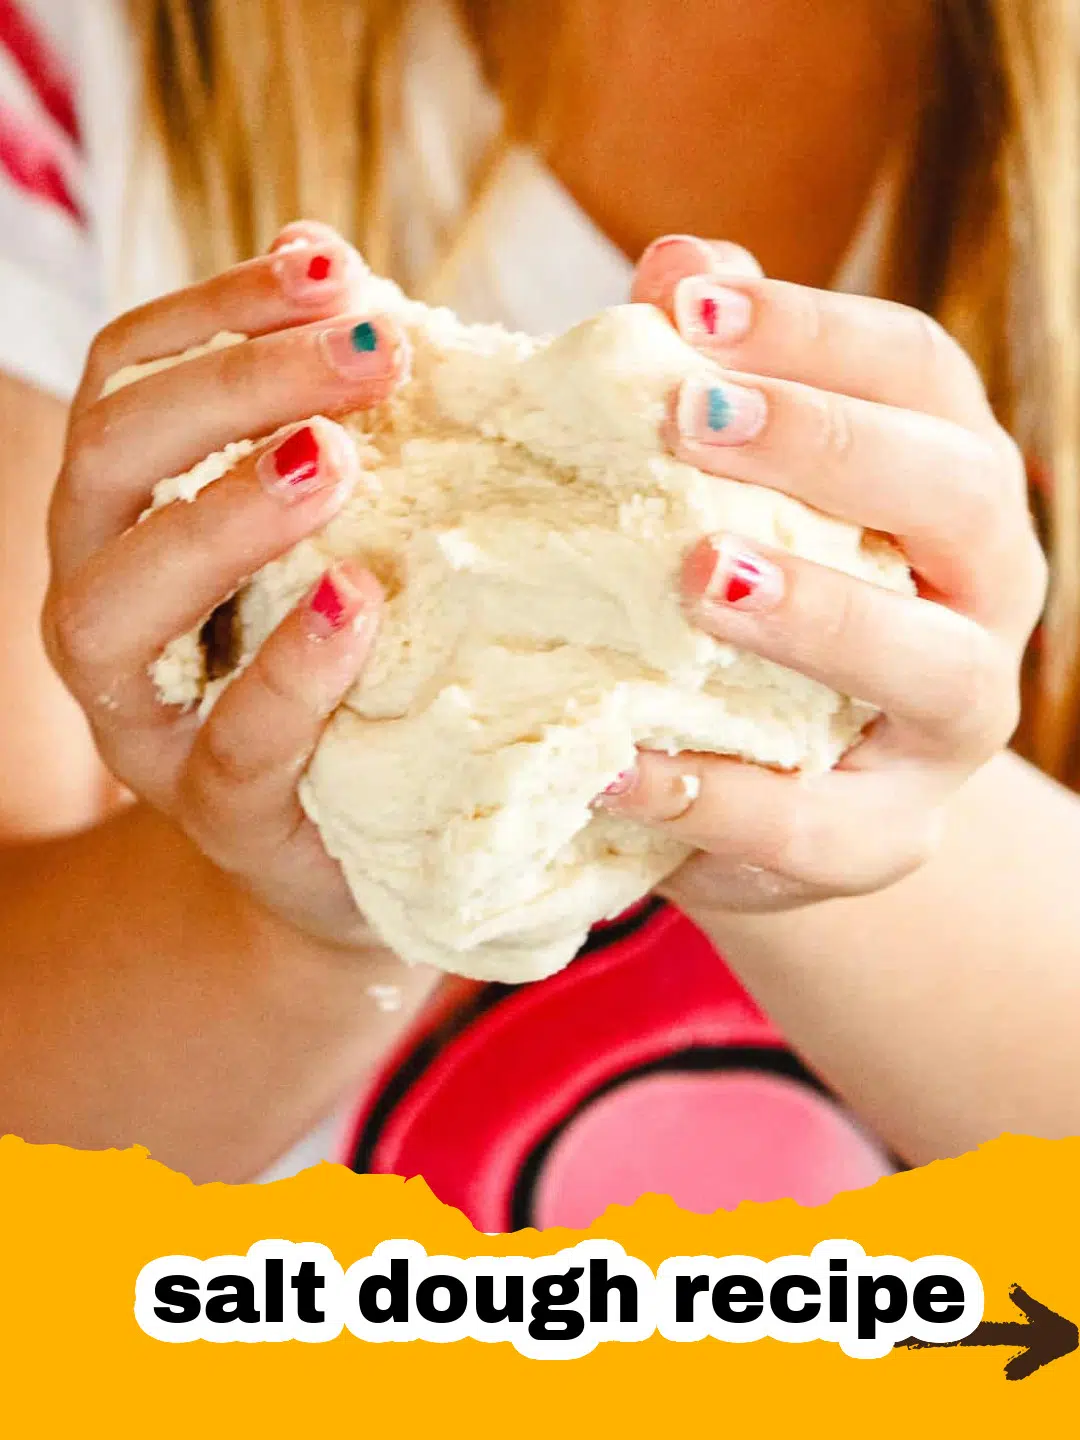
There's something incredibly nostalgic about the simple act of creating. For me, the distinct smell of flour and salt, mixed with a hint of childhood wonder, always brings me back to rainy afternoons at my grandmother's kitchen table. She’d always have a special project ready, and more often than not, it involved this magical substance: salt dough. This easy salt dough recipe isn't just about mixing ingredients; it's about crafting memories, about the quiet joy of hands-on creativity, and about making something beautiful out of almost nothing.
My earliest memories involve proudly presenting my lopsided, painted salt dough creations to my parents, convinced I had just sculpted a masterpiece. These simple moments of joy, much like the comfort of a perfectly made creamy dreamy mashed potatoes recipe on a chilly evening, are the ones that truly stick with you. Now, as a parent myself, passing on this tradition is one of my greatest pleasures. Watching my kids' eyes light up as they roll out the dough, press cookie cutters, or even leave their tiny handprints, is a reminder that the simplest things truly bring the most profound joy. This timeless craft is a fantastic way to spend quality time together, unleash creativity, and make keepsakes that will be cherished for years to come. It’s also incredibly forgiving, making it perfect for beginners of all ages, ensuring every attempt at this wonderful salt dough recipe is a success.
Why This Salt Dough Recipe is a Must-Try
- Budget-Friendly Fun: This incredible salt dough recipe uses just three common pantry staples – flour, salt, and water. It's an incredibly economical way to provide hours of creative entertainment without breaking the bank, proving that you don't need expensive supplies for endless fun.
- Unleash Creativity for All Ages: From toddlers making handprints to adults crafting intricate ornaments, this salt dough recipe is endlessly versatile. It encourages fine motor skills, imaginative play, and artistic expression for every member of the family, making it an ideal activity for playdates or family craft nights.
- Long-Lasting Keepsakes: Unlike some temporary crafts, salt dough creations, when properly dried and sealed, can last for years, becoming cherished ornaments, decorative pieces, or heartfelt homemade gifts. This simple salt dough recipe ensures durable results that will stand the test of time, preserving precious memories.
- Therapeutic and Engaging: The process of mixing, kneading, and shaping the dough is wonderfully tactile and can be incredibly calming. It's a fantastic sensory experience that offers a welcome break from screens, providing a mindful activity for both children and adults.
Key Ingredient Notes for Your Salt Dough Recipe
While the beauty of this salt dough recipe lies in its simplicity, a few pointers on your core ingredients can make a big difference in achieving the perfect consistency for your crafts. Understanding each component ensures your salt dough is perfectly pliable and holds its shape beautifully.
All-Purpose Flour
This is the workhorse of our salt dough recipe. Standard all-purpose flour works beautifully, providing the necessary structure and elasticity for your dough. You don't need anything fancy here; just your everyday flour will do the trick. Ensure it's fresh for the best results, though for crafts, it's not as critical as it would be for something like mastering the art of the perfect prime rib roast, where flour can be used in sauces or gravies and freshness is paramount. The flour gives the dough its body and allows it to be molded into various shapes.
Fine Grain Salt
The salt in our salt dough recipe isn't just a filler; it's crucial for the dough's preservation and texture. Using fine grain salt, like table salt, is highly recommended. It dissolves and integrates much more smoothly into the dough, leading to a consistent, less grainy finish. Coarser salts might leave visible specks and a rougher texture, which can be challenging, especially if you plan to paint your creations later. The high salt content also helps prevent mold and decay, making your creations last longer.
Warm Water
Temperature matters here! Using warm water (not hot, not cold) helps the salt dissolve more effectively and aids in creating a pliable, easy-to-work-with dough. Add your water gradually to the flour and salt mixture. This incremental approach allows you to control the consistency and prevent your dough from becoming too sticky or too dry. Achieving the right consistency is key for a successful salt dough recipe – you want it firm enough to hold its shape but soft enough to knead and roll easily.
Step-by-Step Guide to the Perfect Salt Dough Recipe with Pro Tips
Gather Your Tools and Ingredients
Before you begin, ensure you have a large mixing bowl, a measuring cup, a rolling pin, cookie cutters (if desired), parchment paper, and a baking sheet. Having everything ready makes the process smooth and enjoyable, especially when working with little hands. This salt dough recipe is all about preparation, ensuring a seamless crafting experience from start to finish.
Here’s how to bring your salt dough recipe to life:
Step 1: Combine the flour and salt in a large mixing bowl, whisking them together thoroughly to ensure an even distribution.
Pro Tip: Don't skip the whisking! This ensures your salt is evenly incorporated throughout the flour, which is vital for both the texture and the preservation properties of your salt dough. A well-mixed dry base prevents pockets of undissolved salt later on.
Step 2: Gradually add the warm water, about 1/4 cup at a time, to the flour and salt mixture. Mix with a spoon until a shaggy dough forms.
Pro Tip: Patience is key here. Adding water slowly allows you to gauge the dough's consistency accurately. You might not need all the water, or you might need a tiny bit more, depending on your environment's humidity. Aim for a crumbly mixture that's just starting to come together.
Step 3: Turn the dough out onto a lightly floured surface and knead for 5-7 minutes until it becomes smooth, elastic, and no longer sticky. Add tiny amounts of flour if too sticky, or water if too dry.
Pro Tip: Kneading is crucial for developing the dough's elasticity and making it easy to work with. If the dough is too sticky, add flour a teaspoon at a time. If it's too dry and crumbly, add water a teaspoon at a time. The goal is a smooth, play-dough like consistency that doesn't stick to your hands or the counter. This step truly defines the quality of your finished salt dough recipe craft.
Step 4: Preheat your oven to its lowest setting (usually 200-250°F / 90-120°C) or prepare a safe, dry place for air drying. Line a baking sheet with parchment paper.
Pro Tip: Low and slow is the way to go for drying salt dough. High heat can cause your creations to puff up, crack, or brown too quickly. Parchment paper prevents sticking and makes transfer easy. If air drying, choose a location with good air circulation.
Step 5: Roll out the salt dough to your desired thickness (typically 1/4 to 1/2 inch, depending on the craft). Use cookie cutters, knives, or your hands to shape your creations. Remember to make holes for hanging if making ornaments.
Pro Tip: For consistent drying and baking, try to roll your dough to an even thickness. When making holes for hanging, use a straw or a skewer to create a clean, appropriately sized opening. For intricate shapes, a sharp knife works wonders, but always supervise children when using sharp tools. This is the fun part of any salt dough recipe!
Step 6: Carefully transfer your shaped salt dough pieces to the prepared baking sheet.
Pro Tip: Use a thin spatula or a butter knife to gently lift delicate shapes from your work surface to the baking sheet. This prevents distortion and ensures your hard work doesn't get squashed before drying.
Step 7: Bake at the low temperature for 2-3 hours, or until completely dry and hard. Thicker pieces may take longer. Alternatively, air dry for 24-72 hours, flipping occasionally.
Pro Tip: The drying time can vary significantly based on thickness and humidity. Your salt dough crafts are done when they are hard to the touch and no longer cool in the center. If baking, check them periodically. If air drying, flip them every 12-24 hours to ensure even drying and prevent warping. Fully dry items are crucial for longevity.
Step 8: Once completely dry and cooled, your salt dough crafts are ready for painting, sealing, and decorating!
Pro Tip: Ensure your pieces are thoroughly cooled before painting. Warm dough can affect paint adherence. Now is when your artistic vision truly comes alive! The possibilities with this salt dough recipe are endless.
Creative Variations & Crafting Ideas for Your Salt Dough Recipe
Once you've mastered the basic salt dough recipe, the real fun begins! This versatile medium is perfect for a myriad of creative projects. Here are some of my favorite ways to use salt dough, transforming simple ingredients into cherished art.
Handprint and Footprint Keepsakes
- Making Memories: This is perhaps the most beloved use of a salt dough recipe. Roll out a thick piece of dough (about 1/2 to 3/4 inch thick). Gently press your child’s hand or foot into the dough to create an impression. Trim around the print with a knife or cookie cutter, create a small hole for hanging, and dry. These make incredible gifts for grandparents and cherished family heirlooms, capturing a moment in time forever.
- Personalization: After the impression, you can use a toothpick or skewer to write names and dates directly into the dough before drying. This adds an extra layer of sentiment to your precious keepsake from this easy salt dough recipe.
Holiday Ornaments and Decorations
- Cookie Cutter Fun: Use your favorite cookie cutters to create festive shapes like stars, trees, gingerbread men, or hearts. Remember to make a hole at the top of each ornament before drying if you plan to hang them. These are perfect for Christmas trees or seasonal decor.
- Texture and Embellishments: Before drying, you can press lace, leaves, or even small toys into the dough for interesting textures. Beads or glitter can be added after baking and painting, adding sparkle and dimension to your salt dough recipe creations.
Gift Tags and Decorative Embellishments
- Unique Tags: Cut small shapes and stamp letters into them to create personalized gift tags. They add a beautiful handmade touch to any present, making even a simple gift feel extra special.
- Rustic Decor: Use natural elements like cinnamon sticks or cloves pressed into the dough before baking for a fragrant, rustic look. These are lovely for autumn or winter decor, filling your home with a subtle, warm scent alongside your salt dough recipe creations.
Painting and Sealing Your Salt Dough Creations
After your salt dough crafts are completely dry, it's time for the finishing touches. This is where your creations truly come to life and where the beauty of your salt dough recipe shines!
- Painting: Acrylic paints work best for salt dough. They provide vibrant colors and good coverage. Let the paint dry completely before moving to the next step. For detailed work, small brushes are helpful. You can experiment with different painting techniques, from solid colors to intricate designs.
- Sealing: Sealing is crucial for protecting your salt dough creations from moisture and giving them a lovely finish. You can use clear acrylic spray sealant (matte or glossy), Mod Podge, or even a clear varnish. Apply several thin coats, allowing each to dry thoroughly. This step will significantly extend the life of your precious items, protecting them from humidity and dust. Store your finished pieces in an airtight container, perhaps even some Basics Glass Food Storage containers, to protect them from humidity over time, preserving your beautiful salt dough recipe crafts for years.
Beyond Ornaments: Creative Salt Dough Projects
- Small Bowls or Dishes: Shape the dough over an oven-safe bowl (lined with foil) to create a decorative dish. Bake until firm, then remove from the mold, paint, and seal. Perfect for holding keys or trinkets (not food!).
- Magnets: After cutting and drying small salt dough shapes, glue a strong magnet to the back for custom fridge decor. These make fantastic personalized gifts or party favors, showcasing the versatility of this easy salt dough recipe.
- Lettering and Numbers: Roll out dough and cut letters or numbers. These can be used for learning activities, room decorations, or spelling out names for personalized gifts. The possibilities are truly endless when you have a reliable salt dough recipe at your fingertips.
Nutrition Information for Salt Dough (For Craft Purposes Only)
While this salt dough recipe uses ingredients typically found in food, it is important to remember that salt dough is NOT intended for consumption due to its extremely high salt content. The nutritional information provided below is a theoretical estimate based on the ingredients for a standard serving size of the dry mixture, for informational purposes only, and should not be interpreted as dietary advice for human consumption. This salt dough recipe is solely for creative crafting.
| Nutrient | Amount Per Serving (approx. 1/4 cup dry mix) |
|---|---|
| Calories | ~100 kcal |
| Carbohydrates | ~22g |
| Cholesterol | 0mg |
| Fat | ~0.5g |
| Fiber | ~1g |
| Protein | ~3g |
| Saturated Fat | 0g |
| Serving Size | 1/4 cup dry mixture (for craft purposes only, NOT for consumption) |
| Sodium | ~1500mg |
| Sugar | 0g |
| Trans Fat | 0g |
| Unsaturated Fat | ~0.5g |
Conclusion: Crafting Memories with This Salt Dough Recipe
There you have it – a simple, versatile, and incredibly rewarding salt dough recipe that’s sure to bring joy and creativity to your home. Whether you're looking for a fun rainy-day activity, a way to make personalized gifts, or just a therapeutic craft project, this salt dough recipe is truly unbeatable. It empowers you to create beautiful, lasting items with minimal fuss and expense. Embrace the imperfections, cherish the process, and most importantly, have fun making memories. The next time you find yourself with a few pantry staples and a yearning for creativity, remember this classic salt dough recipe. Happy crafting!
FAQs
How long does salt dough last after it's been made?
When properly dried and sealed, salt dough creations can last for many years. It's crucial to ensure they are completely dry before painting and sealing to prevent mold, and to store them in a dry environment, away from humidity.
Can you paint salt dough, and what kind of paint should I use?
Yes, salt dough is perfect for painting! Acrylic paints are highly recommended as they provide vibrant colors and good coverage. Once the paint is dry, you should apply a clear sealant (like acrylic spray sealant or Mod Podge) to protect the colors and the dough itself.
What is the best way to dry salt dough to prevent cracking?
The best way to dry salt dough is slowly and at a low temperature. You can bake it in an oven at its lowest setting (200-250u00b0F or 90-120u00b0C) for 2-3 hours (or longer for thicker pieces), or air dry it for 24-72 hours. Flipping the pieces occasionally during air drying helps ensure even drying and minimizes warping or cracking.
How should I store unused salt dough, or finished salt dough crafts?
Unused salt dough can be wrapped tightly in plastic wrap and stored in an airtight container at room temperature for up to a week, or in the refrigerator for up to two weeks. Finished and sealed salt dough crafts should be stored in a dry, airtight container to protect them from humidity, which can cause them to soften or degrade over time.
Classic Salt Dough for Crafts & Ornaments
- Total Time: 2-4 hours
- Yield: Enough for 15-20 small ornaments 1x
Description
A timeless and incredibly versatile salt dough recipe perfect for creating beautiful, long-lasting crafts, ornaments, and keepsakes. Easy to make with just three pantry staples!
Ingredients
2 cups all-purpose flour
1 cup fine grain salt (table salt)
3/4 cup warm water (or slightly more/less, as needed)
Instructions
Step 1: Combine the flour and salt in a large mixing bowl, whisking them together thoroughly to ensure an even distribution.
Step 2: Gradually add the warm water, about 1/4 cup at a time, to the flour and salt mixture. Mix with a spoon until a shaggy dough forms.
Step 3: Turn the dough out onto a lightly floured surface and knead for 5-7 minutes until it becomes smooth, elastic, and no longer sticky. Add tiny amounts of flour if too sticky, or water if too dry.
Step 4: Preheat your oven to its lowest setting (usually 200-250°F / 90-120°C) or prepare a safe, dry place for air drying. Line a baking sheet with parchment paper.
Step 5: Roll out the salt dough to your desired thickness (typically 1/4 to 1/2 inch, depending on the craft). Use cookie cutters, knives, or your hands to shape your creations. Remember to make holes for hanging if making ornaments.
Step 6: Carefully transfer your shaped salt dough pieces to the prepared baking sheet.
Step 7: Bake at the low temperature for 2-3 hours, or until completely dry and hard. Thicker pieces may take longer. Alternatively, air dry for 24-72 hours, flipping occasionally.
Step 8: Once completely dry and cooled, your salt dough crafts are ready for painting, sealing, and decorating!
Notes
While this salt dough recipe uses edible ingredients, it is intended for crafting purposes only and not for consumption due to the extremely high salt content. Always supervise children during crafting and ensure they understand it's not food. Store any unused dough in an airtight container at room temperature for up to a week, or in the refrigerator for longer.
- Prep Time: 15 minutes
- Cook Time: 2-3 hours (drying/baking time)
- Category: Crafts, DIY Projects
- Cuisine: Craft
Nutrition
- Serving Size: 1/4 cup dry mixture (for craft purposes only, NOT for consumption)
- Calories: ~100 kcal
- Sugar: 0g
- Sodium: ~1500mg
- Fat: ~0.5g
- Saturated Fat: 0g
- Unsaturated Fat: ~0.5g
- Trans Fat: 0g
- Carbohydrates: ~22g
- Fiber: ~1g
- Protein: ~3g
- Cholesterol: 0mg
Leave a Reply