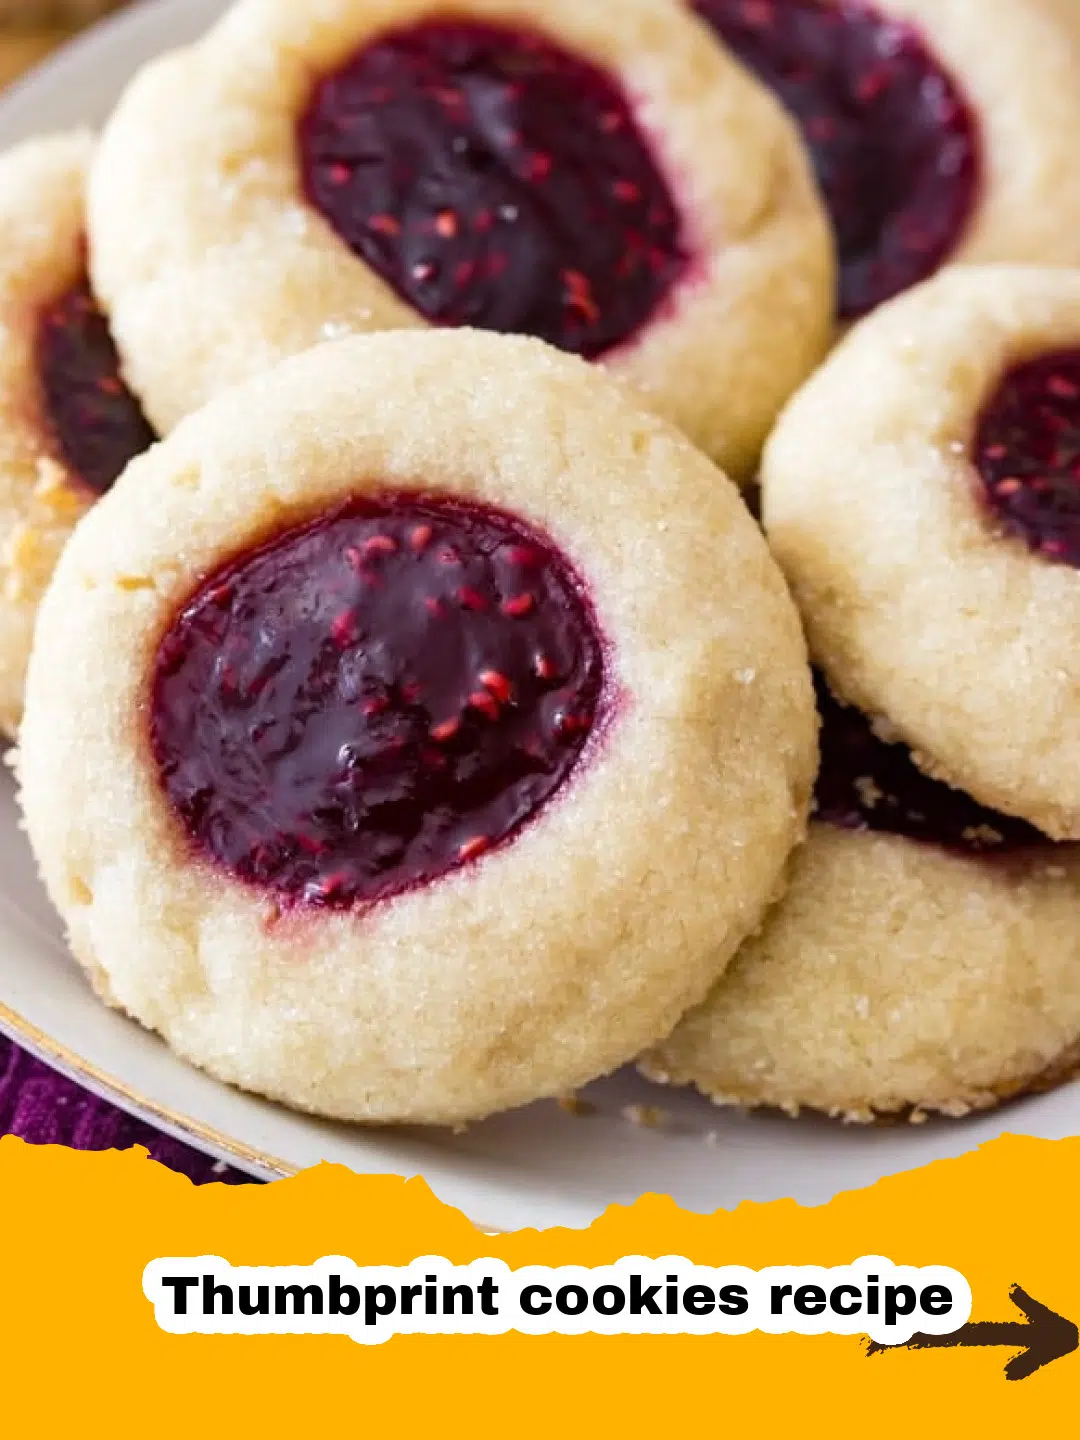
There's something uniquely comforting about a classic Thumbprint cookies recipe. For me, these delightful little gems aren't just cookies; they're a direct portal to my grandmother's kitchen, especially during the holidays. I can still vividly recall the scent of buttery shortbread mingling with sweet raspberry jam wafting through her cozy home, a scent that meant joy, family, and a generous sprinkle of love. Each year, we'd gather around her worn wooden table, little hands eager to press the perfect indent into the soft dough, creating the 'thumbprint' that gives these cookies their charming name. It was a simple tradition, but one that etched itself into my heart, teaching me that the best things in life, and in baking, are often made with patience and a touch of homemade warmth. This Thumbprint cookies recipe isn't just about ingredients; it's about recreating those cherished memories and making new ones, one delicious bite at a time.
Why This Recipe is a Must-Try
If you're looking for a cookie that's both enchanting to look at and incredibly satisfying to eat, then this Thumbprint cookies recipe is your answer. Here’s why these beautiful cookies deserve a spot on your baking list:
- Timeless Appeal & Nostalgia: These cookies have graced holiday platters and dessert tables for generations, and for good reason! The buttery, melt-in-your-mouth shortbread base perfectly complements the sweet, fruity jam filling. There's a reason the Thumbprint cookies recipe evokes such strong feelings of nostalgia – it’s a taste of cherished traditions and simpler times.
- Easy to Customize & Versatile: While traditional jam is king, don't feel limited! You can experiment with a myriad of fillings, from decadent chocolate ganache to bright lemon curd, or even creamy caramel, making each batch a new adventure. This incredible versatility ensures that your Thumbprint cookies recipe can always be adapted to suit any palate or occasion.
- Perfect for Gifting & Sharing: Beautifully presented and universally loved, thumbprint cookies make an excellent homemade gift for friends, family, or neighbors during the festive season. Arranged artfully in a tin or cellophane bag, they’re a thoughtful and delicious way to share a bit of homemade sweetness. They travel well, too, making them ideal for potlucks or cookie exchanges.
- Kid-Friendly Baking Fun: The simple act of pressing the 'thumbprint' into the dough is a fun and engaging step for little helpers in the kitchen. Involving children in the process of making this Thumbprint cookies recipe not only creates lasting memories but also sparks an interest in baking. Just imagine their delight as they fill each little well with their favorite colorful jam!
Key Ingredient Notes
The magic of a truly outstanding Thumbprint cookies recipe lies in the quality and preparation of a few simple ingredients. Don't underestimate their power!
- Unsalted Butter (Room Temperature is Key!): This is the very heart of your Thumbprint cookies recipe. Using unsalted butter allows you precise control over the overall salt content, ensuring a balanced flavor. But the most crucial aspect is its temperature. Ensure it's genuinely at room temperature – soft enough to leave an indent when pressed, but not melted or greasy. This is vital because softened butter creams properly with the sugar, incorporating air that creates a light, tender crumb.
- Granulated Sugar (Beyond Sweetness): While sugar obviously provides sweetness, its role in a Thumbprint cookies recipe extends much further. When creamed with butter, the sugar crystals cut into the butter, creating tiny air pockets. These pockets expand during baking, contributing to the cookies' delicate texture and slight rise. It also aids in achieving that beautiful golden-brown edge.
- All-Purpose Flour (Structure with Care): All-purpose flour is the structural backbone of your cookies. It’s important to measure flour correctly (the "fluff, spoon, and level" method is best) to avoid adding too much, which can make cookies tough. The cardinal rule here is to avoid overmixing once the flour is added. Overworking the dough develops gluten, resulting in a chewier, tougher cookie rather than the desired delicate, crumbly texture.
- Your Favorite Jam (The Star Filling): The vibrant jewel-like center is what truly defines a Thumbprint cookies recipe. Raspberry and apricot jams are classic choices, but feel free to choose any fruit preserve you adore. Look for a good quality jam that isn't too runny; a thicker consistency will hold its shape better during baking and prevent it from bubbling over excessively.
Step-by-Step Guide with Pro Tips
Ready to bake a batch of these irresistible cookies? Follow these detailed steps for a flawless Thumbprint cookies recipe experience. Precision and a little patience are your best friends here!
- Step 1: Cream the Butter and Sugar to Perfection. In a large mixing bowl, using an electric mixer (either stand or hand-held), cream together your softened unsalted butter and granulated sugar on medium speed. Beat them until the mixture becomes light, fluffy, and visibly paler in color, which usually takes about 2-3 minutes. This step is critical for incorporating air, contributing to the tender texture of your Thumbprint cookies recipe. Periodically scrape down the sides of the bowl to ensure all ingredients are thoroughly combined.
- Step 2: Introduce the Flavor & Richness. Add the pure vanilla extract and the egg yolk. Beat these into the creamed butter and sugar until just combined. The egg yolk isn't just a binder; it adds significant richness to the cookie dough, enhancing its flavor and contributing to that melt-in-your-mouth quality that makes this Thumbprint cookies recipe so beloved. Avoid overmixing once these are added.
- Step 3: Gently Incorporate Dry Ingredients. Gradually add the all-purpose flour and a pinch of salt to the wet ingredients. Mix on the lowest speed of your electric mixer, or even by hand with a spatula, until the flour streaks have almost disappeared and the mixture is just combined. The key here is gentle mixing. Overworking the dough at this stage will develop the gluten, resulting in a tough, dense cookie, which is the opposite of what we want for a perfect Thumbprint cookies recipe.
- Step 4: Crucial Dough Chilling (Don't Skip!). Gather the dough into a ball, flatten it slightly into a disk, and wrap it tightly in plastic wrap. Refrigerate for at least 30 minutes, and ideally for 1 to 2 hours. This chilling step is absolutely crucial for any successful Thumbprint cookies recipe. It allows the butter to firm up, preventing the cookies from spreading excessively during baking. You can even chill the dough overnight if preparing ahead of time!
- Step 5: Preheat Your Oven & Prepare Baking Sheets. While your dough is chilling, take a moment to preheat your oven to 350°F (175°C). Line two baking sheets with parchment paper or silicone baking mats. This non-stick surface ensures your cookies bake evenly and are easy to remove without sticking, simplifying the cleanup of your Thumbprint cookies recipe adventure.
- Step 6: Form the Cookie Balls with Care. Remove the chilled dough from the refrigerator. If it's too firm, let it sit for a few minutes to soften just enough to be workable. Scoop out tablespoon-sized portions of dough and roll them between your palms into smooth, uniform balls. For an extra layer of texture and flavor, you can optionally roll each dough ball in granulated sugar or finely chopped nuts before making the indent.
- Step 7: Create the Signature Indentations. Place the cookie balls about 2 inches apart on your prepared baking sheets. Now comes the fun part that gives these cookies their name! Using your thumb (or for a more uniform look, the back of a rounded 1/2 teaspoon measuring spoon), gently but firmly press an indentation into the center of each cookie ball. If the edges crack too much, simply use your fingers to gently smooth them back together. Aim for a decent well to hold a good amount of jam for your Thumbprint cookies recipe.
- Step 8: Fill with Your Chosen Jam. Spoon about 1/2 to 3/4 teaspoon of your chosen fruit jam into each indentation. Be mindful not to overfill, as the jam will bubble and spread slightly during baking. Too much jam can cause it to overflow and burn. This filling step truly defines the classic Thumbprint cookies recipe – choose a color that pops!
- Step 9: Bake Until Golden and Bubbly. Carefully transfer the baking sheets to your preheated oven. Bake for 12-15 minutes, or until the edges of the cookies are lightly golden brown and the jam filling is bubbly and set. Keep an eye on them, as oven temperatures can vary. You want them to be just set, avoiding overbaking which can make them dry. The aroma filling your kitchen will be incredible – a clear sign your Thumbprint cookies recipe is almost ready!
- Step 10: Cool Completely and Admire. Let the cookies cool on the baking sheets for about 5 minutes after removing them from the oven. This allows them to firm up slightly before you attempt to move them. Then, carefully transfer them to a wire rack to cool completely. Once cooled, a delicate dusting of powdered sugar adds a beautiful, finished look. Store any leftover Thumbprint cookies recipe creations in an airtight container at room temperature for up to 5 days. For optimal freshness, I highly recommend these Basics Glass Food Storage containers – they keep everything perfectly sealed.
Variations & Serving Suggestions
One of the joys of mastering the basic Thumbprint cookies recipe is the endless possibilities for customization. Get creative and make these cookies uniquely yours!
- Nutty Delights for Extra Crunch: For an added layer of texture and a rich, earthy flavor, roll your dough balls in finely chopped pecans, walnuts, or almonds before making the indentation and filling with jam. This creates a wonderful contrast to the soft cookie and sweet filling, making each bite of your Thumbprint cookies recipe even more exciting.
- Decadent Chocolate Indulgence: If you’re a chocolate lover, this variation is for you! Instead of jam, fill the indentations with a dollop of creamy Nutella, a few mini chocolate chips, or a small piece of dark chocolate. After baking, a delicate drizzle of melted chocolate over the top can elevate these to a truly gourmet experience. This takes the humble Thumbprint cookies recipe to new heights of deliciousness.
- Bright & Zesty Citrus Burst: For a refreshing and tangy alternative, use a high-quality lemon curd or orange marmalade as your filling. The vibrant citrus notes offer a beautiful contrast to the buttery cookie. A small sprinkle of fresh lemon or orange zest on top of the filling before baking can amplify that delightful zing.
- Peanut Butter & Chocolate Twist: For a familiar and beloved flavor combination, fill your indentations with a small dollop of creamy peanut butter. Once baked, immediately press a mini chocolate candy (like a Reese's Miniature) into the warm peanut butter for a delightful fusion reminiscent of a peanut butter blossoms recipe, but with the tender base of a thumbprint cookie. It's an ultimate crowd-pleaser and a fun take on the traditional Thumbprint cookies recipe.
- Caramel & Sea Salt Dream: Fill the wells with a spoonful of dulce de leche or a soft caramel candy. Once baked and slightly cooled, sprinkle with a few flakes of sea salt for a sophisticated sweet and salty combination that will impress everyone.
- Serving Suggestions: These versatile cookies are perfect for virtually any occasion. Serve them alongside a freshly brewed cup of coffee or a comforting mug of tea for an afternoon treat. During the holidays, they are an absolute must-have on your cookie platter, nestled amongst other festive favorites like the delightful chewy molasses cookies recipe or classic shortbread. Beautifully packaged in a festive tin or box, they also make thoughtful and delicious edible gifts that show you care.
Nutrition Information
| Nutrition Facts (per serving) | |
|---|---|
| Calories | 120 kcal |
| Carbohydrate Content | 15g |
| Cholesterol Content | 15mg |
| Fat Content | 6g |
| Fiber Content | 0.5g |
| Protein Content | 1g |
| Saturated Fat Content | 4g |
| Serving Size | 1 cookie |
| Sodium Content | 50mg |
| Sugar Content | 8g |
| Trans Fat Content | 0.2g |
| Unsaturated Fat Content | 2g |
Conclusion
And there you have it – a truly classic and utterly delicious Thumbprint cookies recipe that promises to bring joy with every single bite. From the simple act of pressing the indentations to the delightful moment you taste that buttery shortbread mingling with sweet, bubbly jam, these cookies are a testament to the enduring appeal of homemade treats. Whether you're baking them for a special holiday gathering, a quiet afternoon indulgence, or to share as a heartfelt gift with loved ones, these cookies embody the warmth of home baking and the enduring power of a cherished family tradition. So, gather your ingredients, put on your favorite baking playlist, and get ready to create some sweet, edible magic. Happy baking, and enjoy every delightful, jammy moment of your perfect Thumbprint cookies recipe!
FAQs
What kind of jam is best for thumbprint cookies?
Traditional choices for thumbprint cookies include raspberry, apricot, or strawberry jam. However, you can use any fruit jam or preserve you enjoy! Just make sure it's a good quality jam that isn't too runny, so it holds its shape well during baking and doesn't bubble over excessively. Seedless jams offer a smoother finish, but seedy varieties are also delicious.
Why do my thumbprint cookies spread too much?
Cookies spreading too much can be caused by a few factors. The most common reasons are butter that is too soft (melted vs. softened), not chilling the dough long enough (or at all), or too much flour/not enough fat in the recipe. Ensure your butter is at room temperature but not greasy, and always chill the dough for at least 30 minutes, ideally 1-2 hours, before baking. Also, avoid over-greasing your baking sheets; parchment paper or silicone mats are best.
Can I freeze thumbprint cookies?
Yes, thumbprint cookies freeze beautifully! You can freeze both baked and unbaked dough. To freeze baked cookies, ensure they are completely cooled, then arrange them in a single layer on a baking sheet to flash freeze for about an hour. Once solid, transfer them to an airtight container or freezer bag for up to 2-3 months. Thaw at room temperature before serving. For unbaked dough, form the balls, make the indentations, and then flash freeze before transferring to a freezer bag. You can fill with jam and bake directly from frozen, adding a few extra minutes to the baking time.
What are some variations for thumbprint cookies?
Beyond classic jams, the possibilities are endless! You can fill them with lemon curd, Nutella, mini chocolate chips (melting them slightly after baking), dulce de leche, or even a small dollop of peanut butter topped with a mini chocolate candy. You can also roll the dough balls in finely chopped nuts or granulated sugar before making the indentations for added texture and flavor. Adding spices like cinnamon or cardamom to the dough also creates wonderful variations.

Classic Jam Thumbprint Cookies
- Total Time: 45 minutes
- Yield: 3 dozen cookies 1x
Description
A beloved classic, these tender, buttery cookies with a sweet fruit jam center are perfect for holiday platters or an everyday treat. This easy-to-follow thumbprint cookies recipe creates a melt-in-your-mouth shortbread base filled with your favorite jam.
Ingredients
1 cup (2 sticks) unsalted butter, softened
1/2 cup granulated sugar, plus more for rolling (optional)
1 large egg yolk
1 teaspoon pure vanilla extract
2 1/4 cups all-purpose flour
1/4 teaspoon salt
1/2 cup fruit jam (raspberry, apricot, strawberry, or your favorite)
Instructions
Step 1: Cream the Butter and Sugar. In a large mixing bowl, using an electric mixer, cream together the softened unsalted butter and granulated sugar on medium speed until light and fluffy, about 2-3 minutes. Scrape down the sides of the bowl as needed to ensure everything is well combined for the perfect Thumbprint cookies recipe.
Step 2: Add Vanilla and Egg Yolk. Beat in the vanilla extract and egg yolk until just combined. The egg yolk adds richness and helps bind the dough, contributing to the signature texture of these Thumbprint cookies recipe delights.
Step 3: Incorporate Dry Ingredients. Gradually add the all-purpose flour and salt to the wet ingredients, mixing on low speed until just combined. Be careful not to overmix; overworking the dough can lead to tough cookies. The dough for your Thumbprint cookies recipe should be soft but manageable.
Step 4: Chill the Dough. Cover the dough with plastic wrap and refrigerate for at least 30 minutes, or up to 2 hours. Chilling is a crucial step for this Thumbprint cookies recipe as it helps the butter firm up, preventing the cookies from spreading too much during baking and ensuring they hold their shape.
Step 5: Preheat Oven & Prepare Baking Sheets. While the dough chills, preheat your oven to 350°F (175°C). Line baking sheets with parchment paper or silicone baking mats.
Step 6: Form the Cookies. Remove the chilled dough from the refrigerator. Roll tablespoon-sized portions of dough into smooth balls. If desired, roll each ball in granulated sugar or finely chopped nuts for added texture and flavor (optional step for this Thumbprint cookies recipe).
Step 7: Create the Indentations. Place the cookie balls about 2 inches apart on the prepared baking sheets. Using your thumb or the back of a small measuring spoon, create an indentation in the center of each cookie. If the edges crack, gently smooth them back together.
Step 8: Fill with Jam. Spoon about 1/2 to 3/4 teaspoon of your favorite fruit jam into each indentation. Don't overfill, or the jam might bubble over and burn. This is where the classic Thumbprint cookies recipe truly shines!
Step 9: Bake the Cookies. Bake for 12-15 minutes, or until the edges are lightly golden and the cookies are set. The jam should be bubbly. The exact baking time can vary, so keep an eye on them.
Step 10: Cool and Serve. Let the cookies cool on the baking sheets for a few minutes before transferring them to a wire rack to cool completely. Once cooled, a light dusting of powdered sugar is a beautiful finishing touch. Store your delicious Thumbprint cookies recipe creations in an airtight container at room temperature for up to 5 days.
Notes
For best results, ensure butter is at true room temperature. Chilling the dough is a crucial step to prevent excessive spreading during baking. Avoid overmixing the flour to keep the cookies tender.
- Prep Time: 20 minutes
- Cook Time: 12-15 minutes
- Category: Dessert, Cookies, Baking
- Cuisine: American
Nutrition
- Serving Size: 1 cookie
- Calories: 120 kcal
- Sugar: 8g
- Sodium: 50mg
- Fat: 6g
- Saturated Fat: 4g
- Unsaturated Fat: 2g
- Trans Fat: 0.2g
- Carbohydrates: 15g
- Fiber: 0.5g
- Protein: 1g
- Cholesterol: 15mg
Leave a Reply